Easy start in My Timesheets: Learn how to track personal time and availability?
Learn how to create and manage your worklogs, add personal leaves with the Timesheet Builder.
This set of articles can be used as a guide to get you started easily. If you need additional information, please refer to the advanced documentation.
Tracking time in Timesheet Builder is fast, reliable, and offers multiple options to integrate it easily in your working style. You can either track time directly in the Timesheet Builder app or from your desired ticket. Let’s discover the different time-tracking options.
If you would like to use time tracking features available in a work item, please make sure that your admin activated the option to use Timesheet Builder time tracking provider. Please read how to change the time tracking option in this documentation for Cloud and for Data Center.
Track time with your timer in the issue view
Watch on YouTube: How to track time in Jiras issue view in Timesheet Builder | Time tracking & worklog analysis
Cloud:
-
Please click on the three dots or the clock icon to add the time-tracking timer to your ticket.
Now below the description you are able to see the Timer. If you aren’t able to see this feature, please make sure that your admin has activated this option.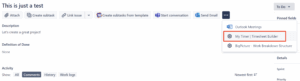
-
Click start.
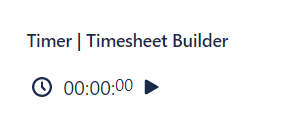
Your timer is now running. It will be visible inside the Timer section or in Timesheet Builder in the calendar view. Otherwise, it will run in the background while you are doing your work.
-
Once you are finished with your task, click stop in the issue view or in My Timesheets, and if needed, you can fill in additional information. Otherwise, you are ready to click on “Save”.
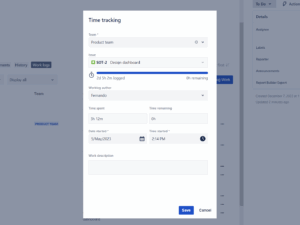
Congratulations – you logged your valuable work and are one step closer to real insights into how you spent your time and resources 🎉
Please note: If the timer has been running for more than 8 hours, you will see the calculated time in red text. At the same time, the timer will shake to notify you.
Data Center:
-
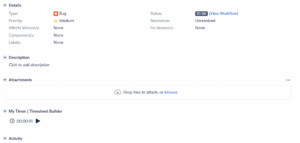
Please find Timer section below Attachments.
If you aren’t able to see this feature, please make sure that your admin has activated this option.
-
Click start.
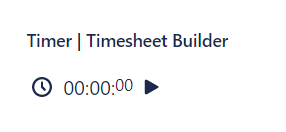
Your timer is now running. It will be visible inside the Timer section or in Timesheet Builder in the calendar view. Otherwise, it will run in the background while you are doing your wor -
Once you are finished with your task, click stop in the issue view or in My Timesheets, and if needed, you can fill in additional information. Otherwise, you are ready to click on “Save”
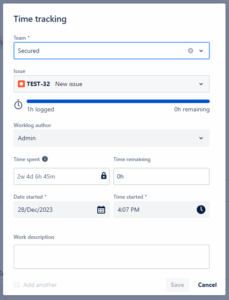
Congratulations – you logged your valuable work and are one step closer to real insights into how you spent your time and resources 🎉
Note: If the timer has been running for more than 8 hours, you will see the calculated time in red text. At the same time, the timer will shake to notify you.
Log time in the issue view
Watch on YouTube: How to track time in Jiras issue view in Timesheet Builder | Time tracking & worklog analysis
Cloud:
-
Please navigate to an issue of your choice.
-
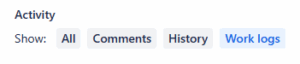
Click on the tab “Work logs”. If you aren’t able to see it, please clarify that your admins have activated Timesheet Builder as your default time-tracking solution in your Jira settings. Read how to do this in Cloud.
-
Click on the blue button “Log Work”.

-
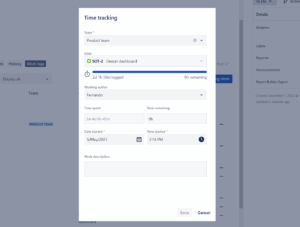
Now you are able to see the log work window.
If you are part of a team, please select a team and the issue you worked on.
-
Now fill in the time that the task took you and if you want you can add a comment to your work log.
-
Click on “Save”.
Congratulations – you logged your valuable work and are one step closer to real insights into how you spent your time and resources 🎉
Data Center:
-
Please navigate to an issue of your choice.
-
Click on the tab “Work logs”. If you aren’t able to see it, please clarify that your admins have activated Timesheet Builder as your default time-tracking solution in your Jira settings. Read how to do this in Data Center.

-
Click on the blue button “Log Work”.

-
Now you are able to see the log work window.
If you are part of a team, please select a team and the issue you worked on.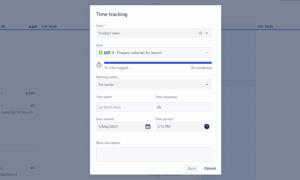
-
Now fill in the time that the task took you and if you want you can add a comment to your work log.
-
Click on “Save”.
Congratulations – you logged your valuable work and are one step closer to real insights into how you spent your time and resources 🎉
Log time in My Timesheets
Please make sure that you have permission to view the My Timesheets module in the Timesheet Builder app. If you can’t access it, please talk to your administrator.
There are three main ways to log time in My Timesheets. You can use the “Log Time” button, drag and drop or click on the + icon, which appears by hovering over a timeslot.
Watch on YouTube: My Timesheets – Timesheet Builder – App features explained | Actonic
Drag and Drop in My Timesheets
-
Please navigate to Timesheet Builder to the “My Timesheets” module.
Now you are able to see the calendar. Please make sure that the date that you are currently looking at is the right one, otherwise use the date time picker to adjust it according to your needs. -
On the right side, you can see the issues. Select one or search for your desired issue and drag and drop it into your timeslot.
-
Now you are able to see the log work window.
If you are part of a team, please select a team and the issue you worked on. -
Now fill in the time that the task took you and if you want you can add a comment to your work log.
-
Click on “Save”.
Congratulations – you logged your valuable work and are one step closer to real insights into how you spent your time and resources 🎉
“Log Time” as a button
-
Please navigate to Timesheet Builder to the “My Timesheets” module.
-
On the top left, you see the “Log Time” button. Please click on it.
-
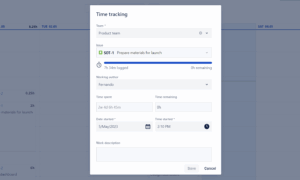
Now you are able to see the log work window.
If you are part of a team, please select a team and the issue you worked on.
-
Now fill in the time that the task took you and if you want you can add a comment to your work log.
-
Click on “Save”.
Congratulations – you logged your valuable work and are one step closer to real insights into how you spent your time and resources 🎉
Click into a timeframe to log time
-
Please navigate to Timesheet Builder to the “My Timesheets” module.
Now you are able to see the calendar. Please make sure that the date that you are currently looking at is the right one, otherwise use the date time picker to adjust it according to your needs.
-
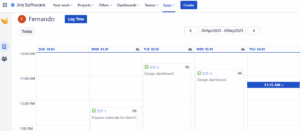
If you hover over a timeframe, a plus icon should appear. Please click on your desired timeframe.
-
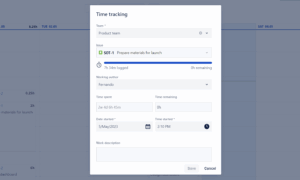
Now you are able to see the log work window.
If you are part of a team, please select a team and the issue you worked on.
-
Now fill in the time that the task took you and if you want you can add a comment to your work log.
-
Click on “Save”.
Congratulations – you logged your valuable work and are one step closer to real insights into how you spent your time and resources 🎉