-
Jira
- Are User Stories Scrum or Agile?
- Can I use Jira software for non-software projects like Marketing or HR?
- Configure statuses and columns in a team-managed Jira project
- Epic Name vs. Epic Link
- How can you share an issue with other users in Jira?
- How do I know if I am a Jira administrator?
- How do team and company managed projects differ?
- How is Jira pronounced?
- How Jira helps in project management?
- How Jira works in Agile?
- How many administrators can Jira have?
- How to add a custom field in Jira
- How to add and customize Jira gadgets?
- How to add watchers in Jira?
- How to configure a company-managed board in Jira?
- How to configure a team-managed project in Jira?
- How to create a Jira ticket
- How to Create an Agile Board in Jira?
- How to create and edit Jira dashboards?
- How to create Canned Responses in Jira Service Management
- How to do Advanced Scrum in Jira?
- How to edit custom Jira fields
- How to link Jira issues
- How to share a Jira ticket
- How to track epics in control chart?
- How to Use Epics in Jira?
- Jira – What is story vs. task?
- Jira – who can start the sprint?
- Jira system fields and their meaning
- Send Jira comments as a permalink
- What are company managed projects in Jira?
- What are custom fields in Jira?
- What are different types of Jira reports?
- What are Jira components?
- What are Jira post functions?
- What are Jira Screens?
- What are Jira workflows?
- What are schemes in Jira?
- What are the Jira roles?
- What are the major types of schemes in Jira?
- What do colors in Jira mean?
- What is a gadget in Jira?
- What is a Jira Admin?
- What is a Jira Dashboard?
- What is a Jira Epic?
- What is a Jira Issue or Ticket?
- What is a Jira Story?
- What is a Project in Jira?
- What is a team managed project in Jira?
- What is Burndown Chart in Jira?
- What is cloning an issue in Jira?
- What is Jira Service Management JSM?
- What is Jira Software?
- What is Kanban in Jira software?
- What is labeling in Jira?
- What is the difference between Jira Software and Jira Service Management?
- What is the Jira user directory?
- What is the latest Jira software version?
- What is the role of validators in Jira?
- What is Xray in Jira?
- What requirements are needed to access Jira Application Suite Utilities?
- When to use subtasks?
- Which issue types are moved to the next sprint automatically when you complete a sprint?
- Which Jira permissions are there?
- Who are agents in Jira Service Management?
- Who can create Jira projects?
- Alle Artikel anzeigen (51) Artikelanzeige reduzieren
-
Confluence
- Confluence Attachment macro explained
- Confluence Date macro explained
- Confluence Expand macro explained
- Confluence Info, Tip, and Warning macro explained
- Confluence shortcuts at a glance
- Confluence Table of Contents macro explained
- Confluence table sorting from A to Z
- Confluence: add a subpage
- Confluence: How to delete a page
- Create Jira tickets directly in Confluence
- Filter Confluence tables
- How do I create a template in Confluence?
- How to create a glossary in Confluence?
- How to move a Confluence page to another space?
- Is Confluence a CMS?
- What is a page in Confluence?
- What is a space in Confluence?
- What is Confluence Presenter mode?
- What is Confluence?
- What is the difference between a page and a space in Confluence?
- What is the difference between Jira and Confluence?
- Why use Confluence?
- Alle Artikel anzeigen (7) Artikelanzeige reduzieren
-
Agility
- Advantages of agile working
- Agile working vs. flexible working
- Difference between program increment and sprint
- How does Scrum work?
- Scrum vs. Kanban
- What are collaboration tools?
- What are Key Performance Indicators (KPIs)?
- What are story points?
- What are the advantages of asynchronous work?
- What are the key Scrum principles?
- What are the principles of agile project management?
- What are the Scrum Roles?
- What are the three levels of the Scaled Agile Framework (SAFe)?
- What does agile mindset mean?
- What is a Help Desk?
- What is a Program Increment (PI)?
- What is a Service Desk?
- What is a Service Level Agreement (SLA)?
- What is a stakeholder?
- What is agile marketing?
- What is agile scaling?
- What is agile working?
- What is an Agile Release Train?
- What is an iteration in Agile?
- What is asynchronous working?
- What is Business Intelligence (BI)?
- What Is Business Intelligence Reporting?
- What is Incident Management?
- What is Inspect and Adapt (I&A)?
- What is IT Service Management?
- What is Performance Benchmarking?
- What is SAFe?
- What is Scrum of Scrums?
- What is Self-Service Business Intelligence (BI)?
- What statement describes the Scaled Agile Framework?
- Alle Artikel anzeigen (20) Artikelanzeige reduzieren
-
Data Security
- Atlassian Data Residency in Germany
- Data controller vs. data processor: What is the difference?
- How do data residency, data sovereignty and data localization differ?
- How does data residency work in the Atlassian Cloud?
- How is customer data encrypted in Atlassian Cloud products?
- IaaS vs. SaaS vs. Paas? How do the types of Cloud computing services differ?
- South Korea’s Personal Information Protection Act (PIPA) – Overview
- Switzerland’s new Federal Act on Data Protection (nFADP)
- The Australian privacy Act 1988
- The Virginia Consumer Data Protection Act (CDPA)
- Turkey's Law on Personal Data Protection (LPDP)
- What additional programs does Atlassian use to support security?
- What are AWS Availability Zones (AZ)?
- What are AWS certifications?
- What are AWS regions?
- What are requirements for Data Residency?
- What are the advantages of the TADAP framework?
- What does a Data Protection Officer (DPO) do?
- What does anonymization of data mean?
- What does data processing mean?
- What does the Atlassian Cloud platform architecture look like?
- What is a Data Center?
- What is a Data Processing Agreement (DPA)?
- What is a Transfer Impact Assessment (TIA) (at Atlassian)?
- What is Africa's Protection of Personal Information Act (POPIA)?
- What is Atlassian Access?
- What is Atlassian's security approach for Cloud?
- What is AWS?
- What is BaFin?
- What is Canada’s Consumer Privacy Protection Act (CPPA)?
- What is CCPA?
- What is Chile’s Law no. 19,628?
- What is Cloud Computing?
- What is data erasure?
- What is data localization?
- What is Data Protection?
- What is data residency?
- What is Data Sovereignty?
- What is Egypt’s Law No. 151?
- What is GDPR?
- What is HIPAA (Health Insurance Portability and Accountability Act)?
- What is India's Personal Data Protection Bill (PDPB)?
- What is ISO 27001?
- What is Israel’s privacy protection authority?
- What is Personally Identifiable Information (PII)?
- What is pseudonymisation/de-identification of data?
- What is the CCPA right to opt-out?
- What is the difference between data protection and data security?
- What is the difference between de-identification/pseudonymization (CCPA) and anonymization (GDPR)?
- What is the Japan Personal Information Protection Act - APPI?
- What is the New Zealand Privacy Act 2020 (NZPA)?
- What is the Nigeria Data Protection Regulation (NDPR)?
- What is the Zero Trust security model (at Atlassian)?
- What kind of data should a company absolutely protect or not store in the first place?
- What's wrong with a former employee's name still being in our system?
- Why data security is important in Cloud computing
- Why is data protection important for a company?
- Alle Artikel anzeigen (42) Artikelanzeige reduzieren
How to create a glossary in Confluence?
Confluence is the ideal place to create a glossary (alphabetical list of terms and meanings). Here’s how to proceed if you want to create a glossary:
-
Install the Basic Glossary plugin.
-
Then create a new section.
-
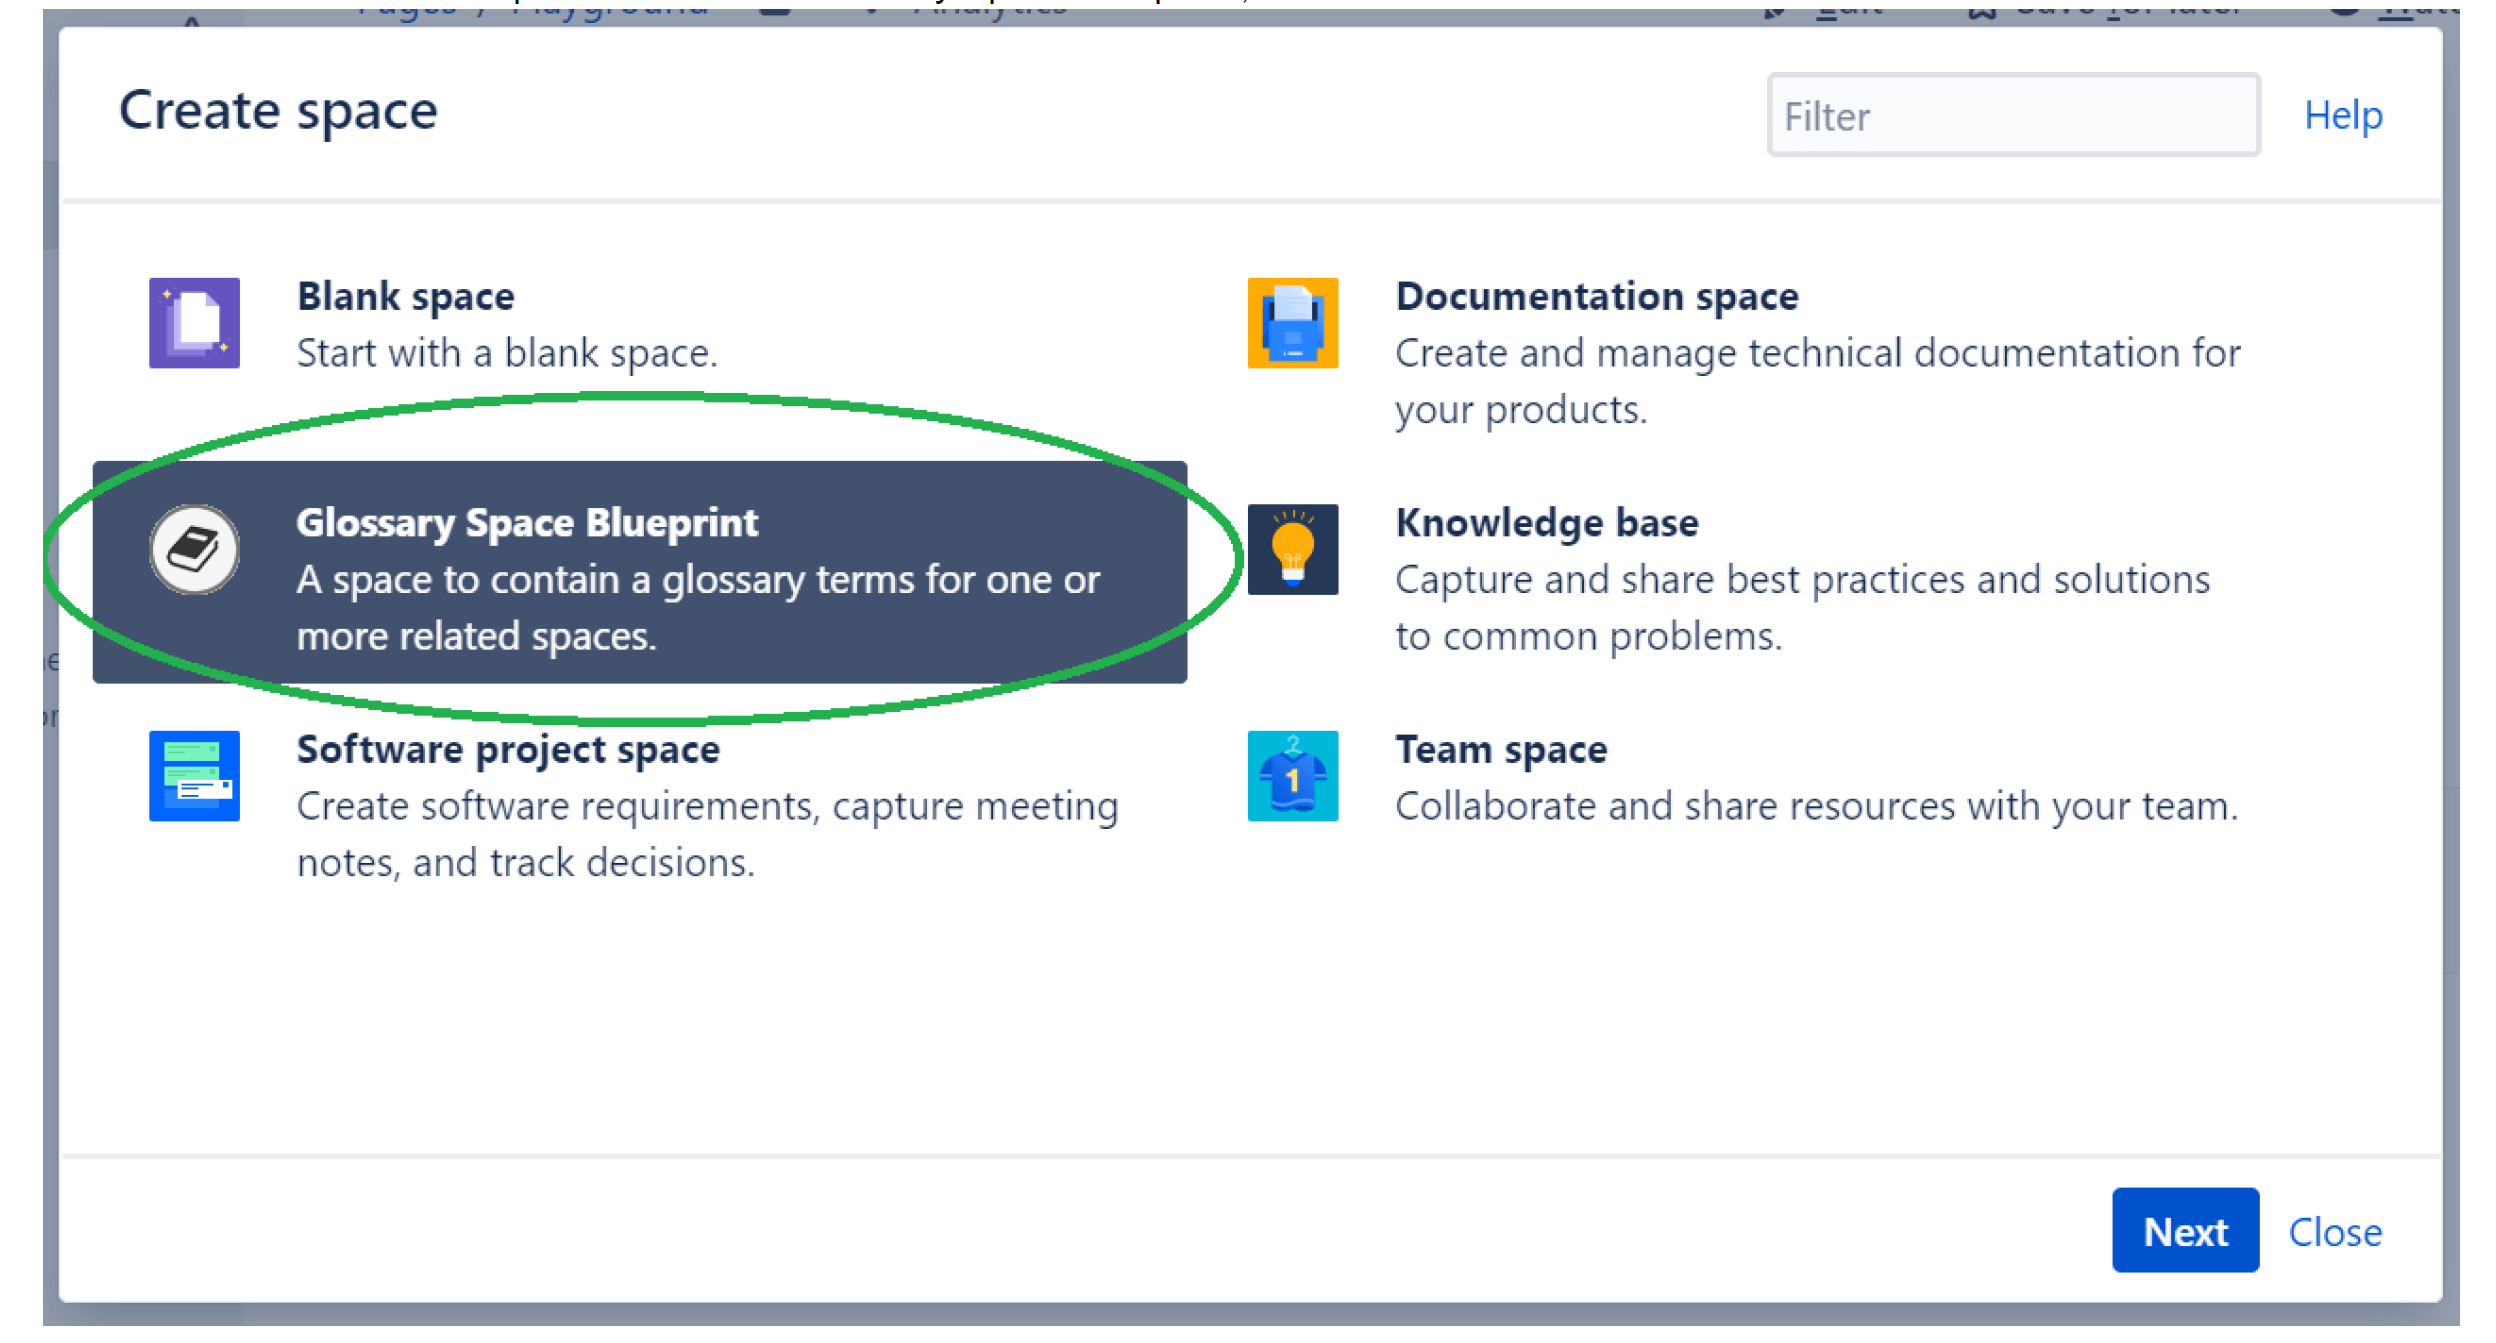
Click “Next” and you will be given the option to create a “Glossary Space Blueprint”.
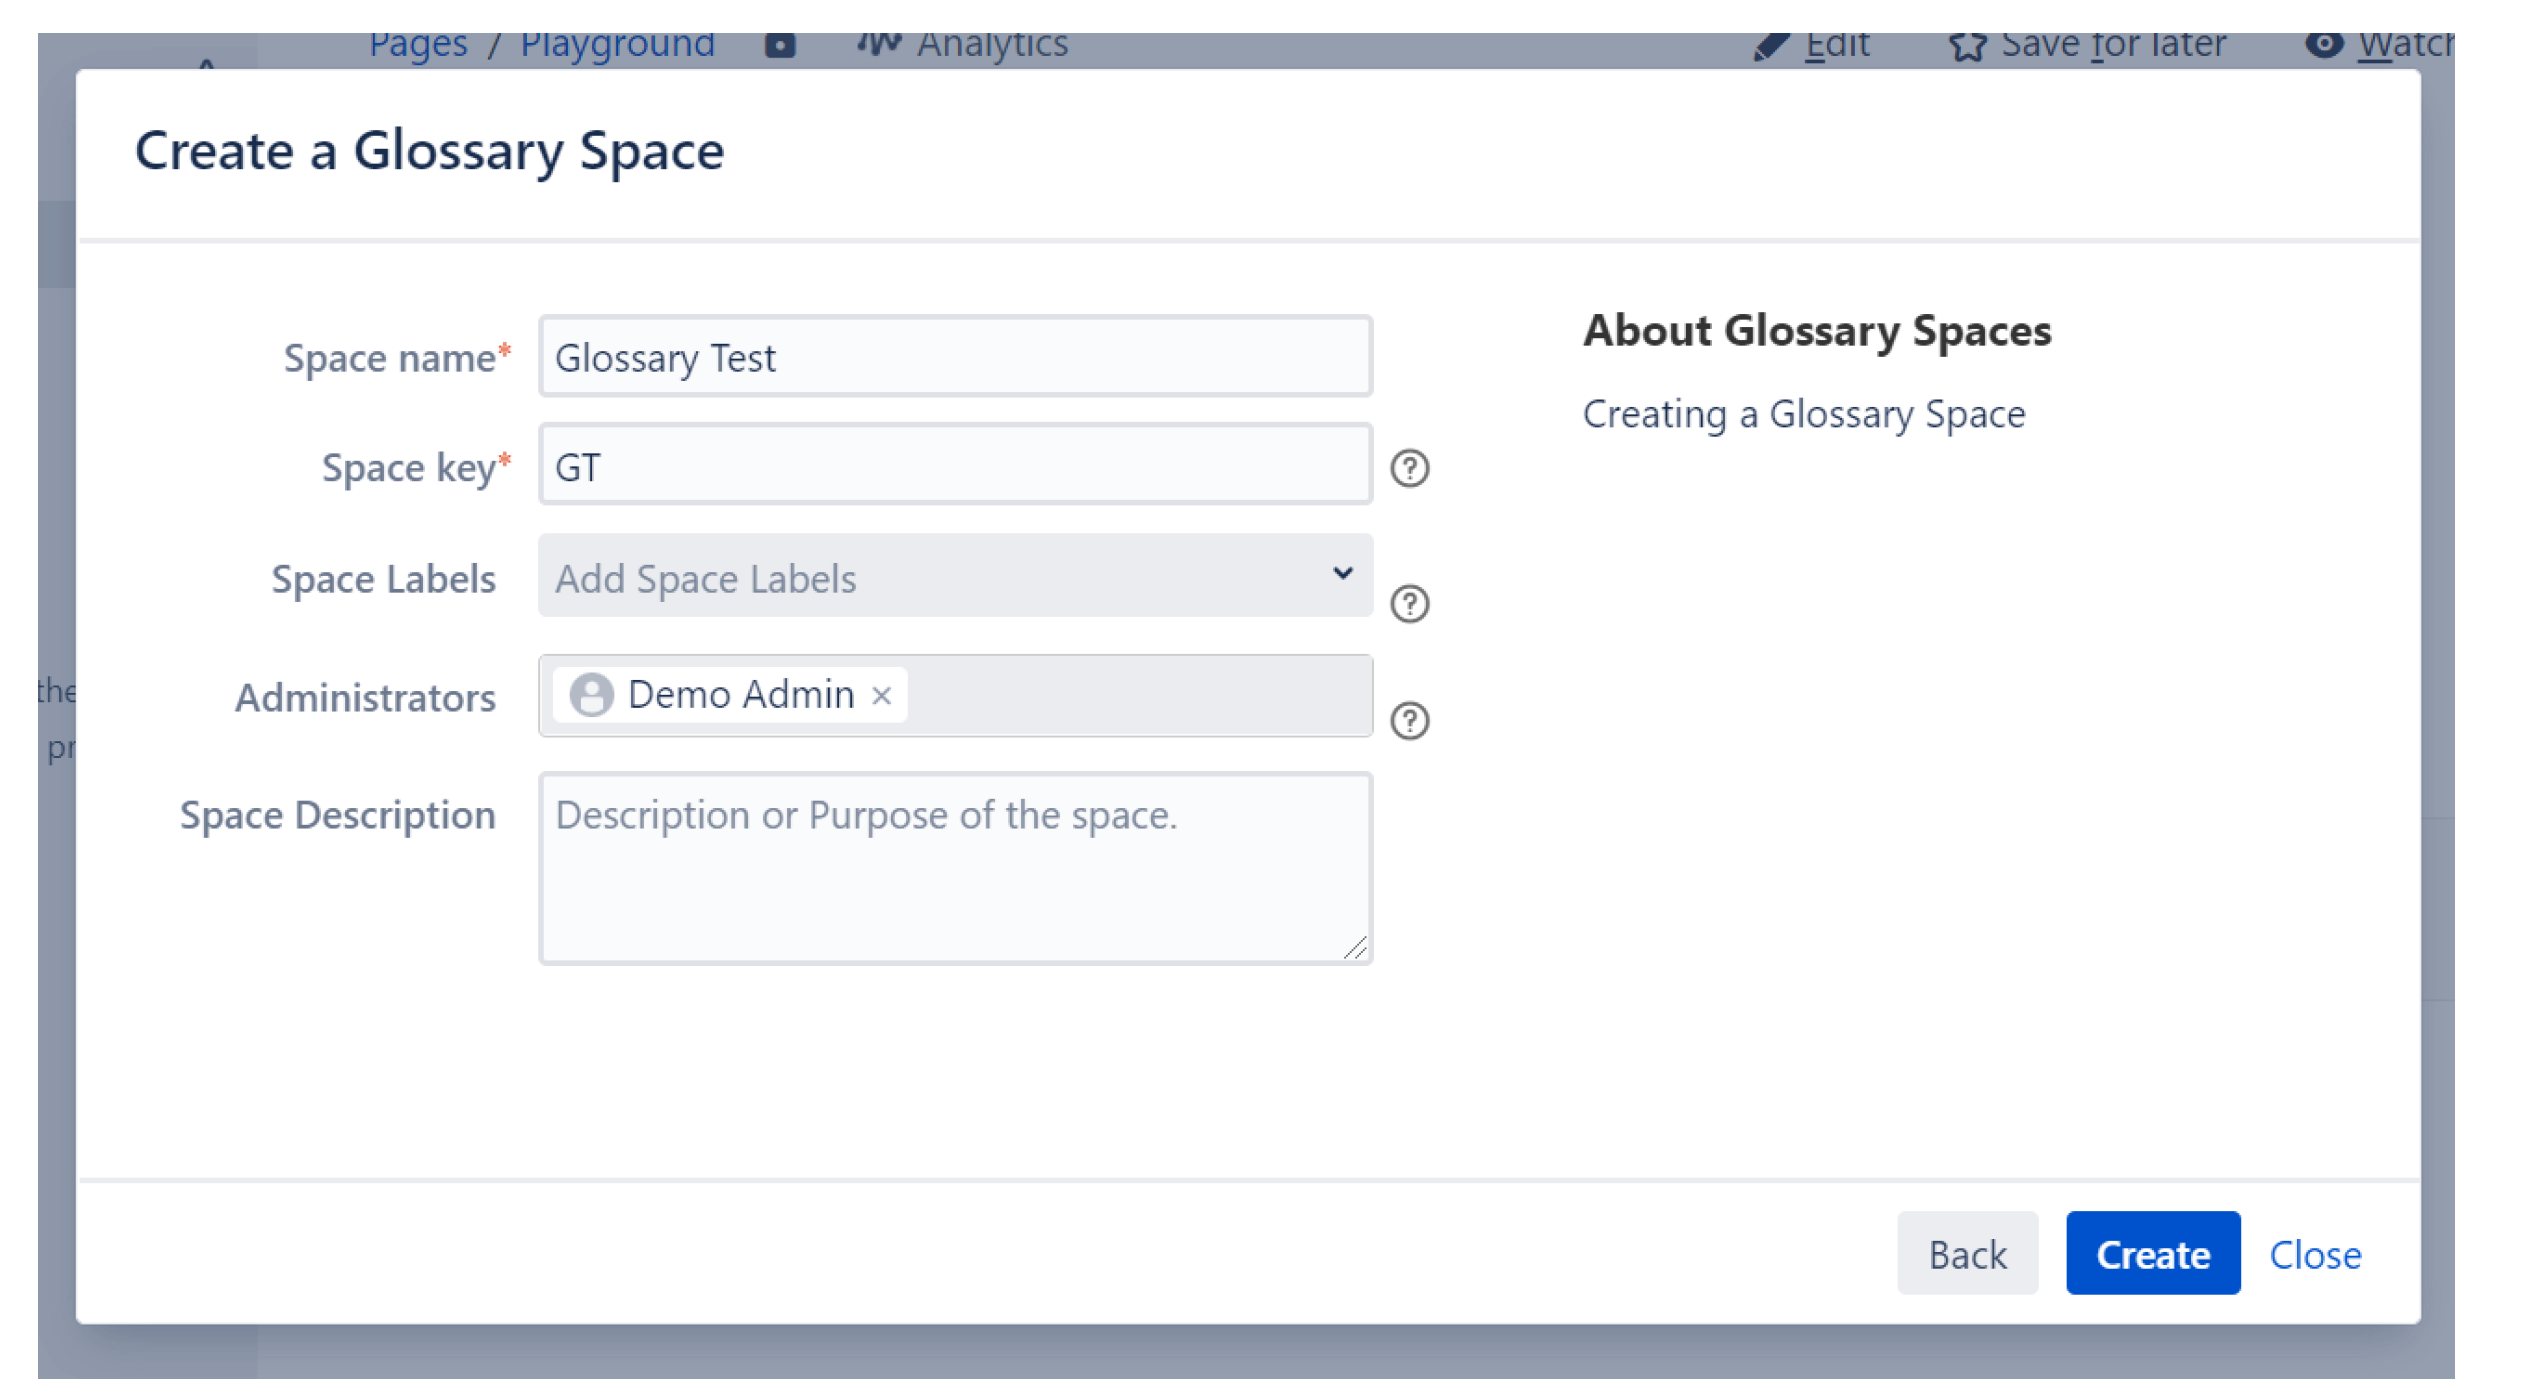
4. Fill in the required details, like the name and key and then click “Create” to finish setting up the space.
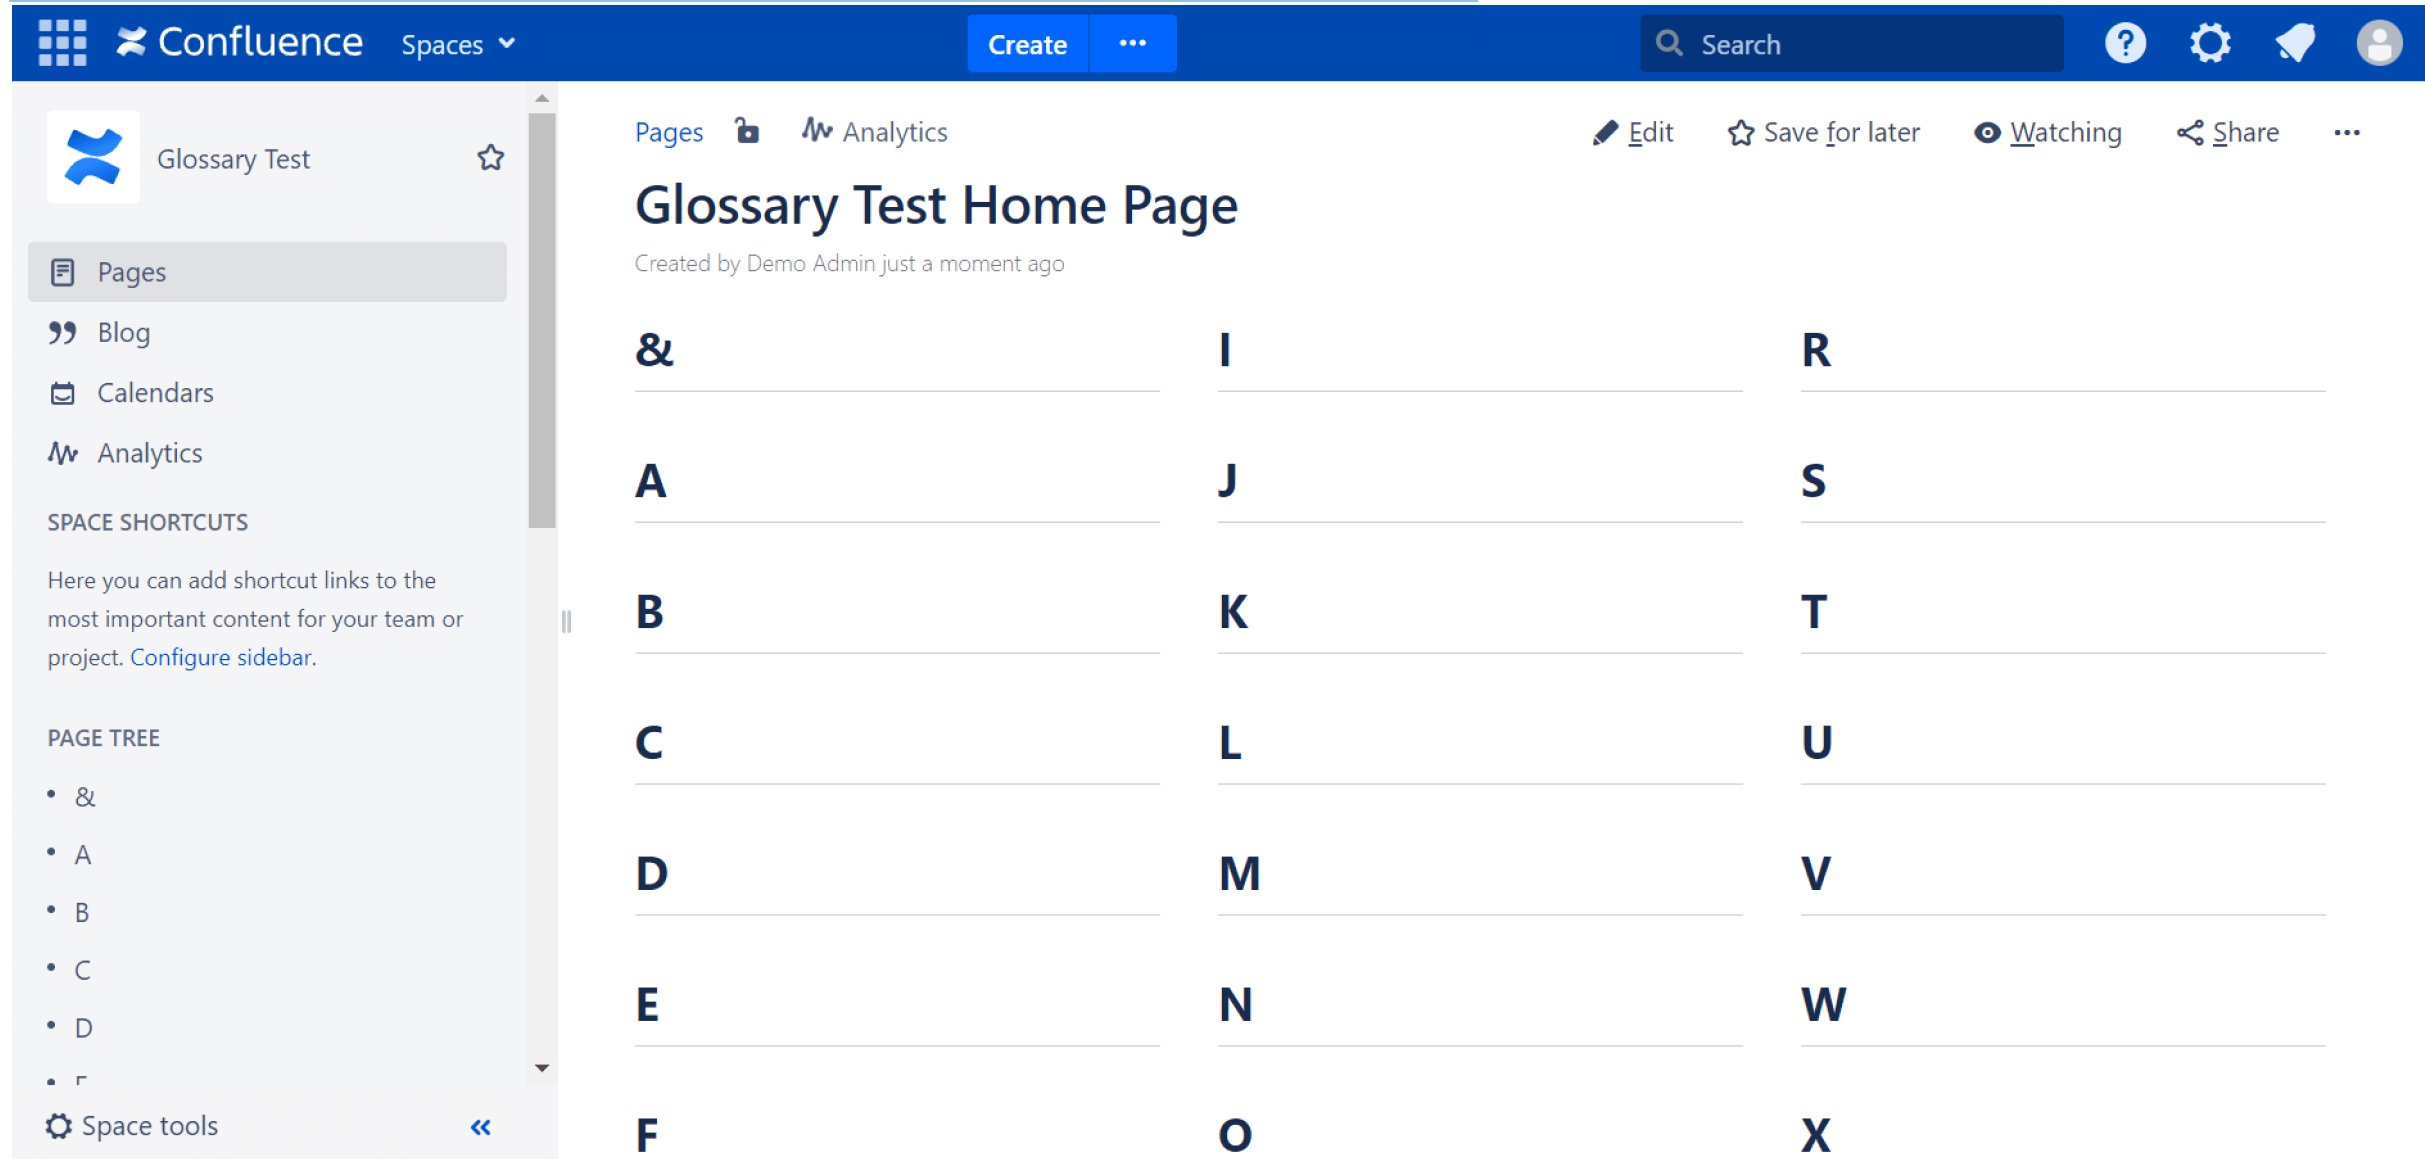
 5. Now, a Glossary space has been created with a page for each letter of alphabet, like this:
6. If we now go back to the menu bar and click on “Create”, you should be able to add “Terms” to your glossary.
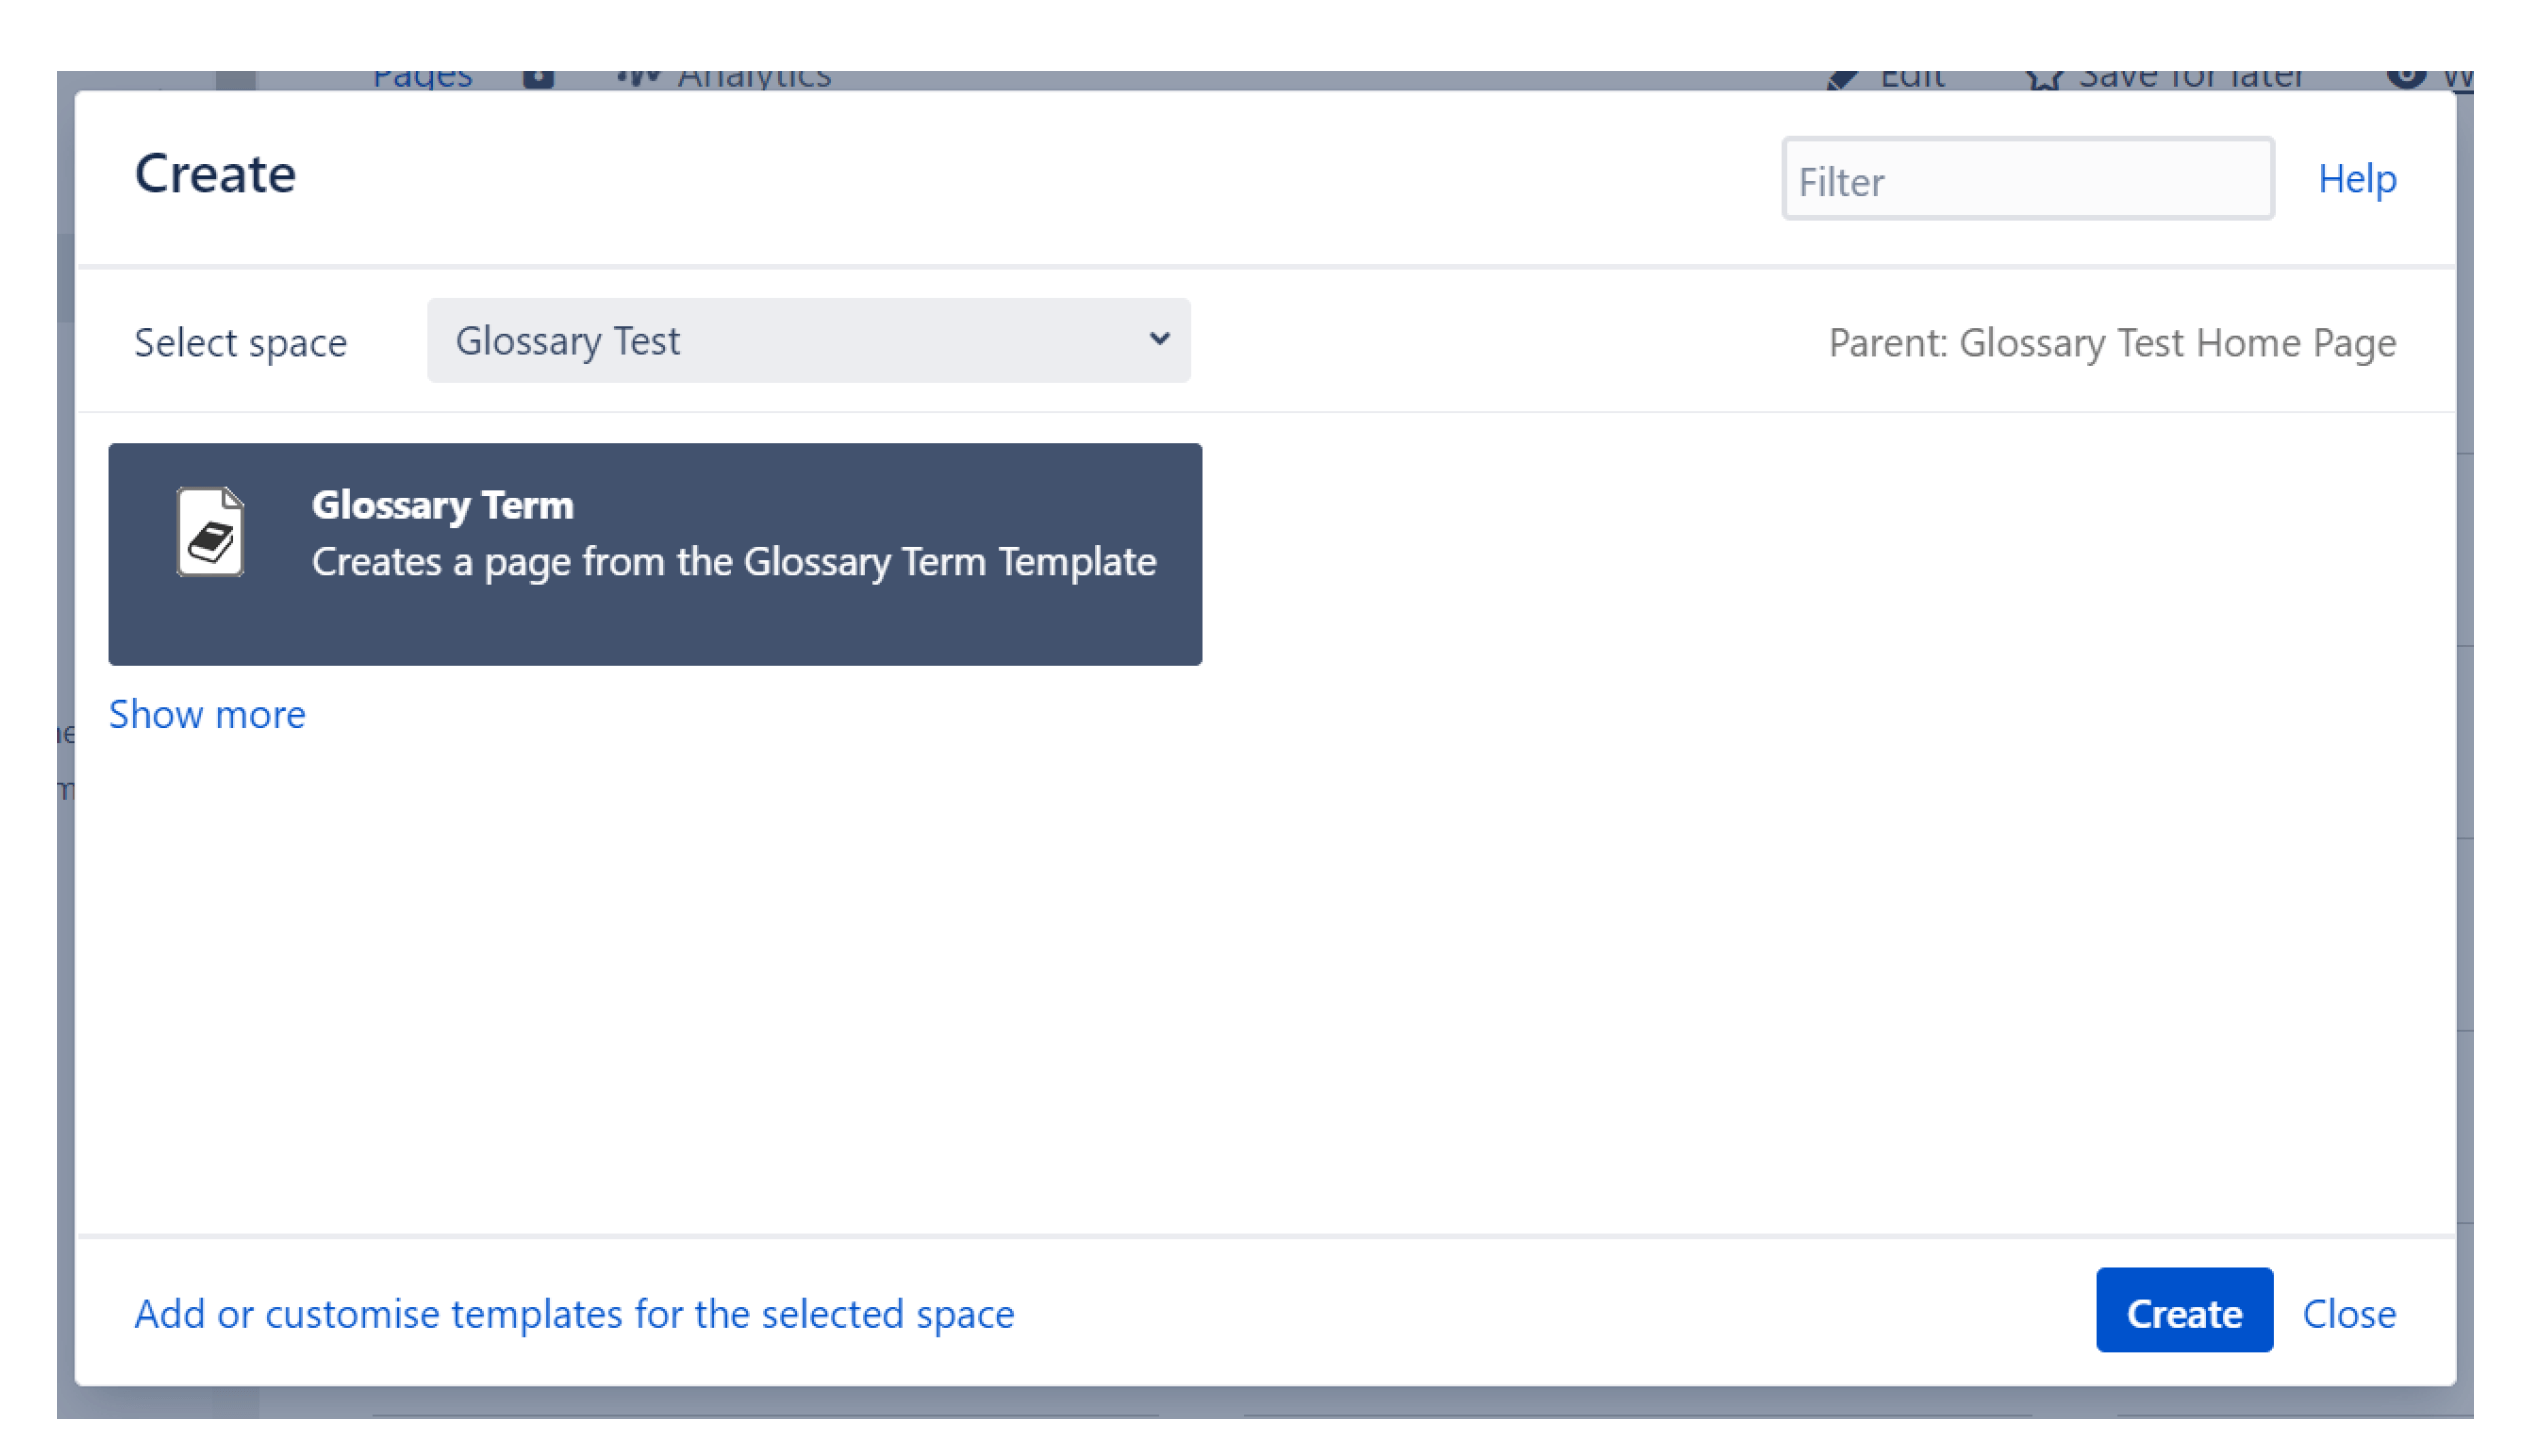
7. Add now the definitions and confirm in the following: “Publish”. We have added the definition of “Glossary” in the example.

8. In the page tree, the entry looks like this:
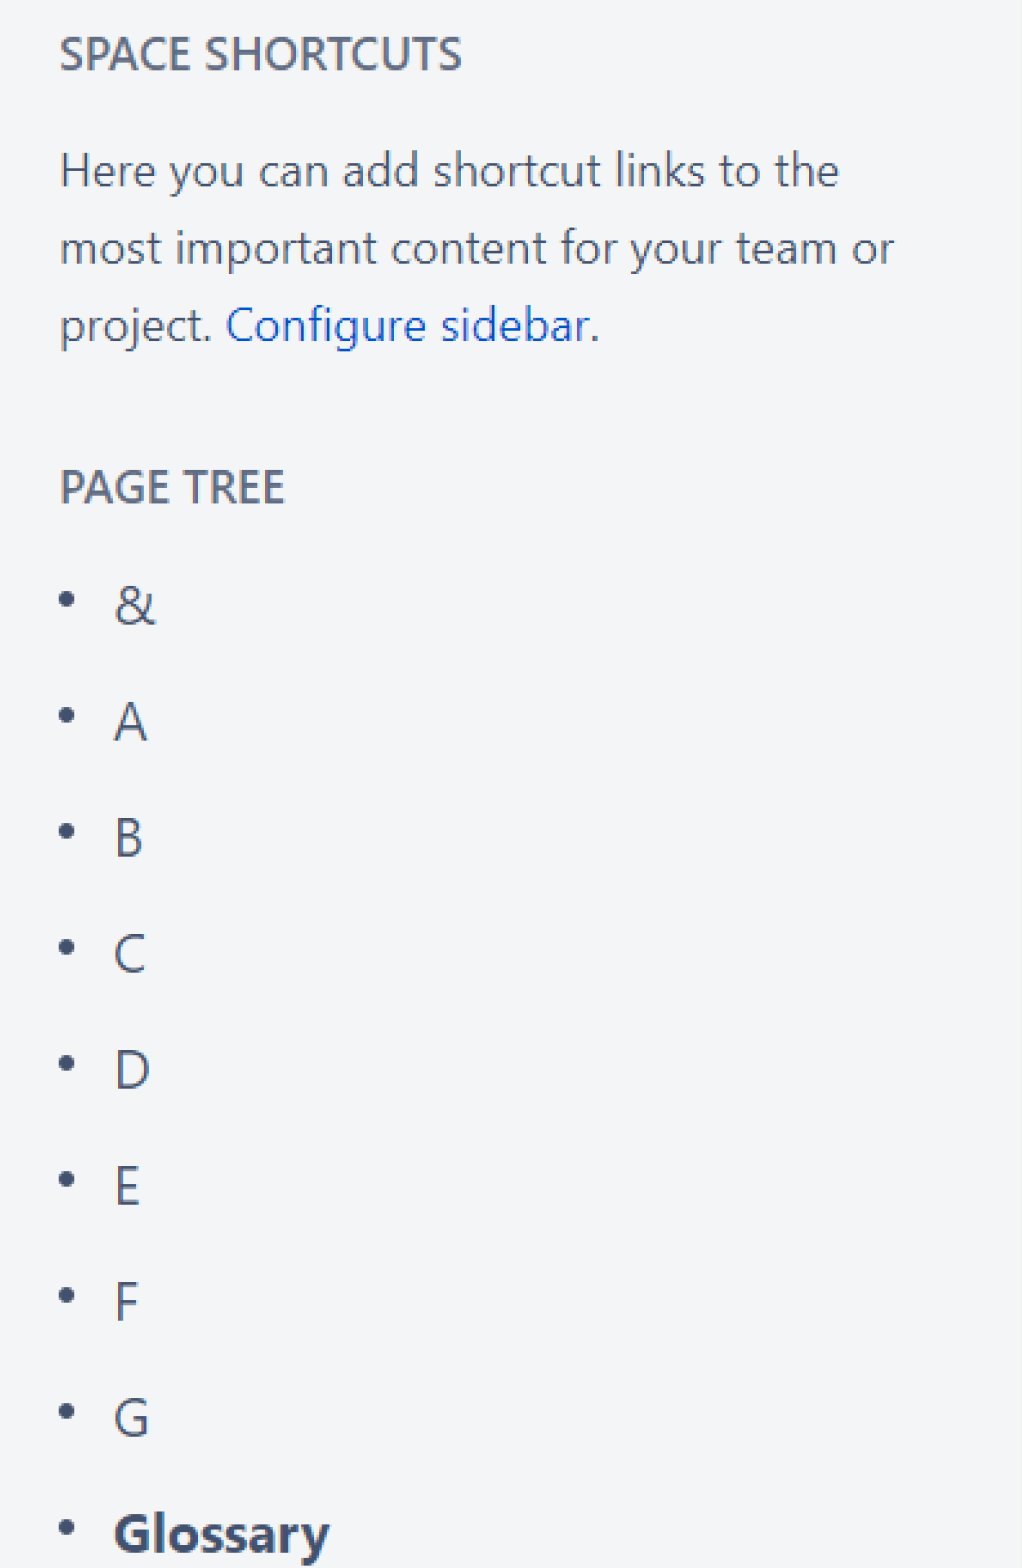
9. We’re not quite done yet, because we should also link the Confluence glossary to other spaces, making it visible and useful for everyone. Click on “Space Tools”, then “Overview” to continue.
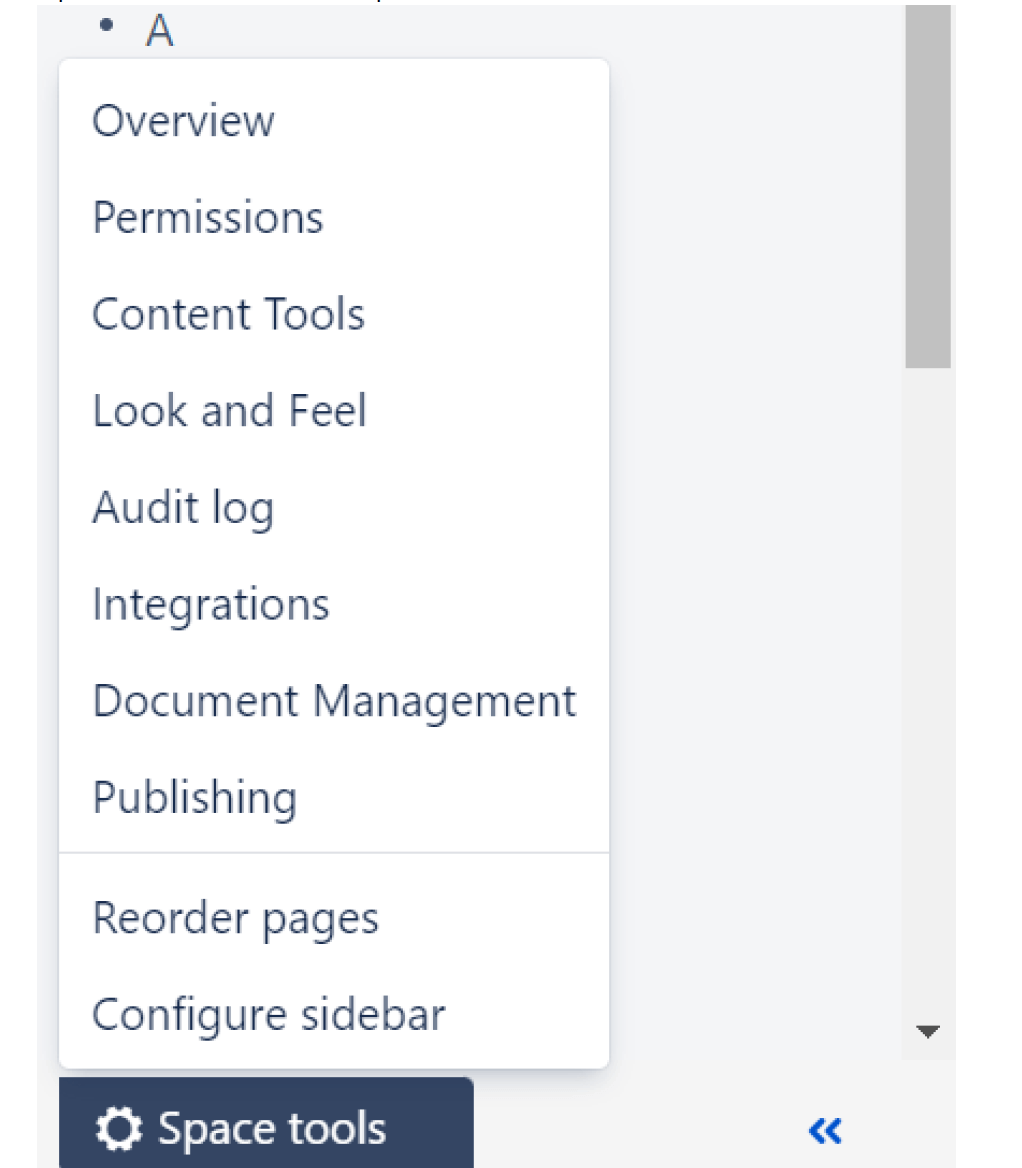
10. Here we can see that there is already a category “Glossary”. To make the content we just created, a definition of the word glossary, visible to other spaces and pages, we should now go to another space where we can also access the space tools to add the category “Glossary”.
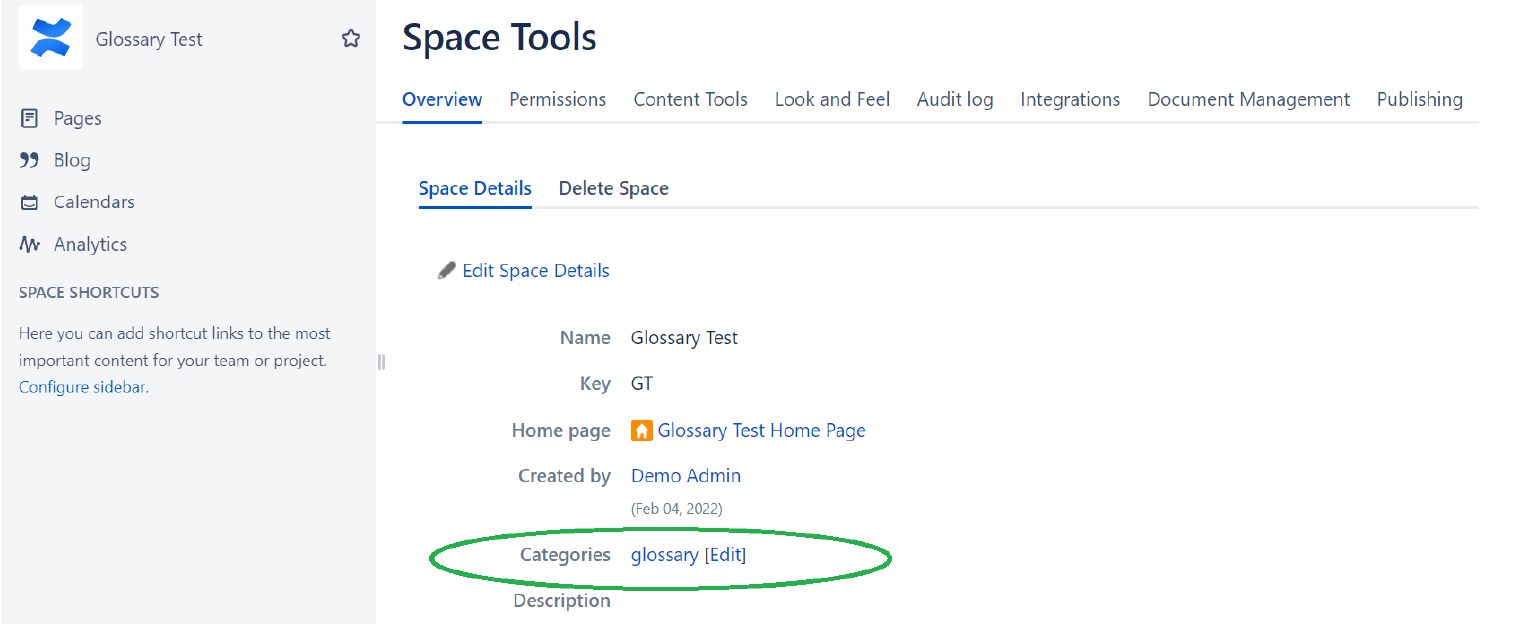
11. Below you can see an area where there are no categories yet. Let’s click on “Edit”.
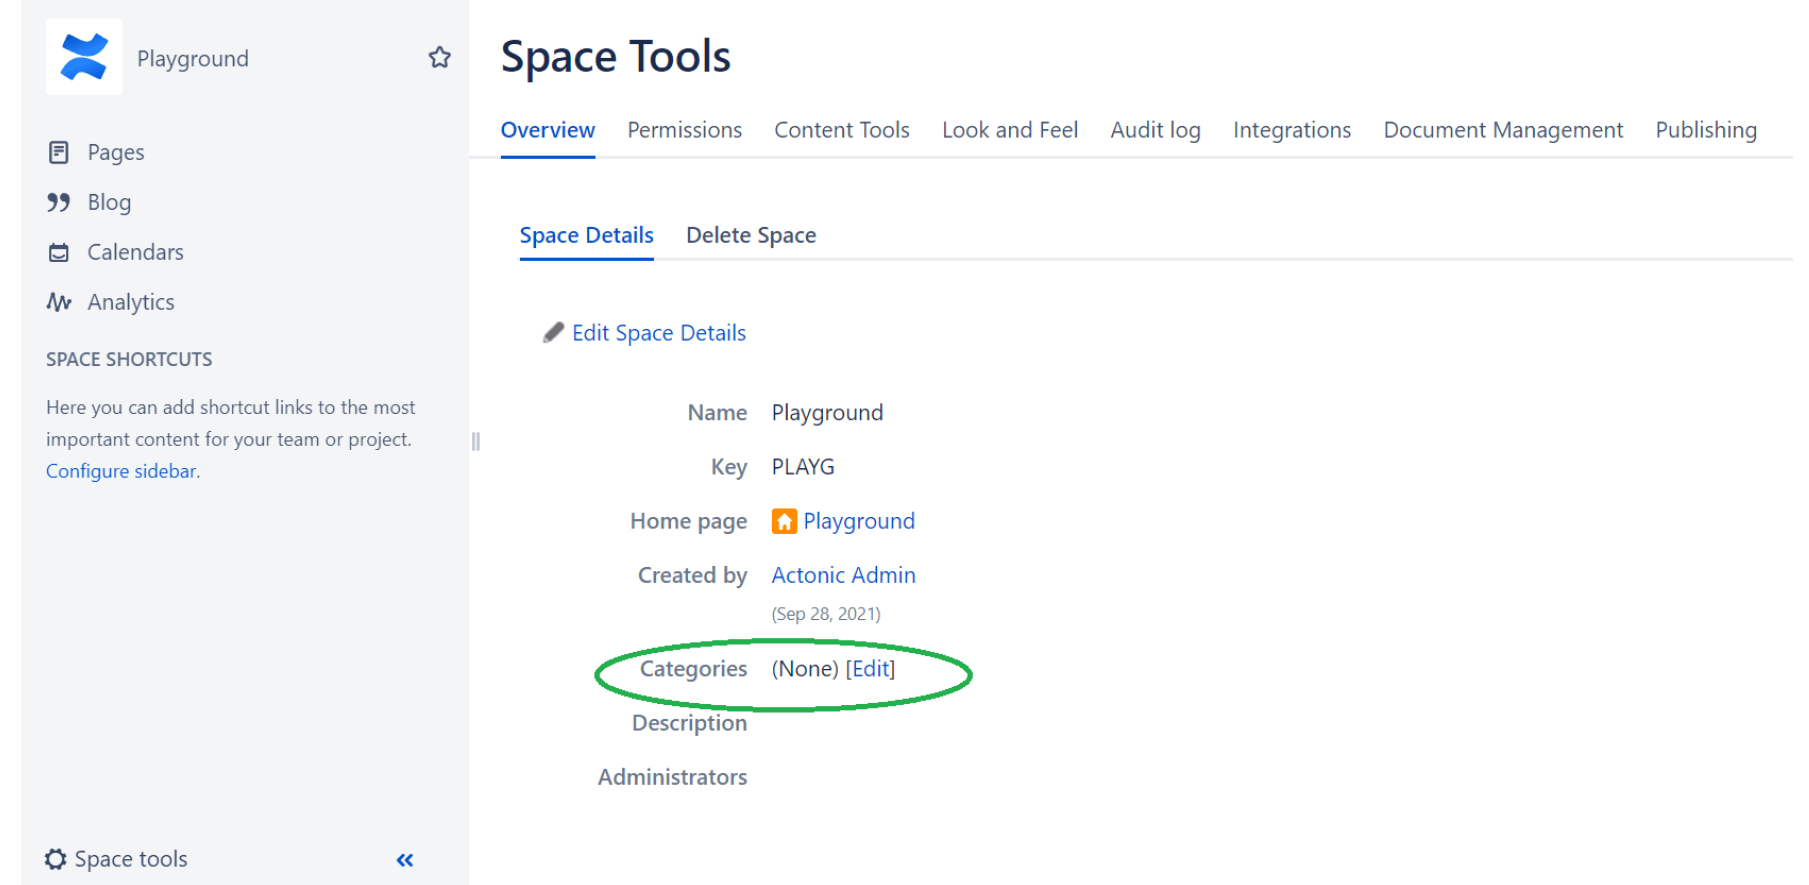
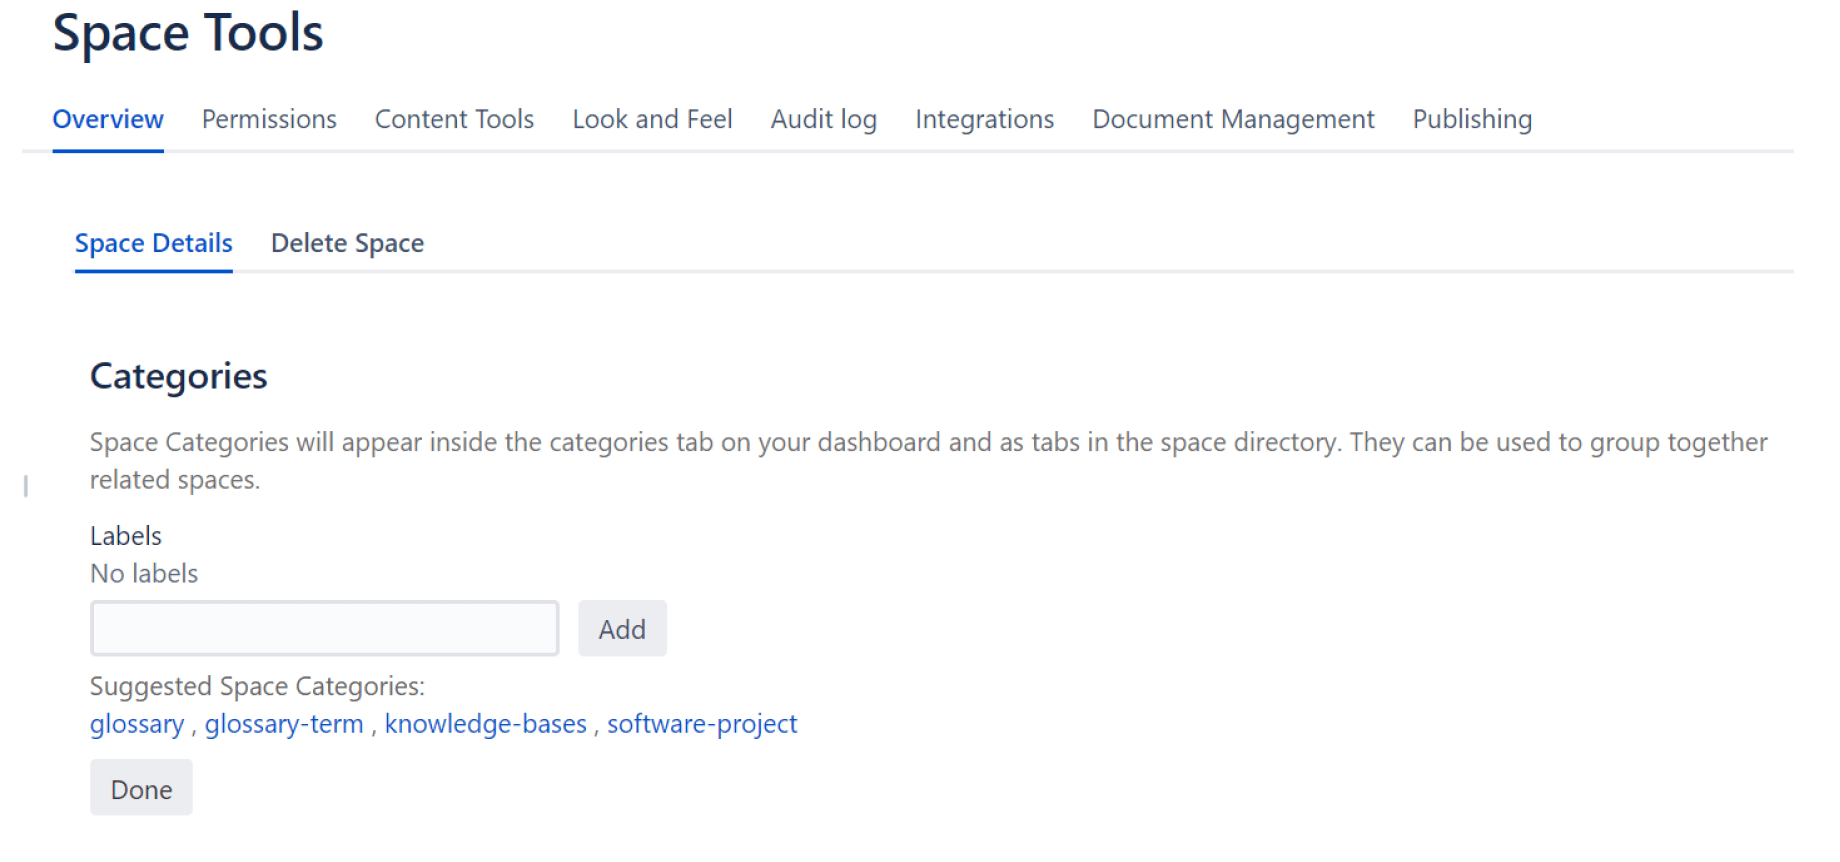
12. Here, the category “Glossary” is already suggested, so we can add it to the “Categories” for this area by clicking on it and then click on “Done”.
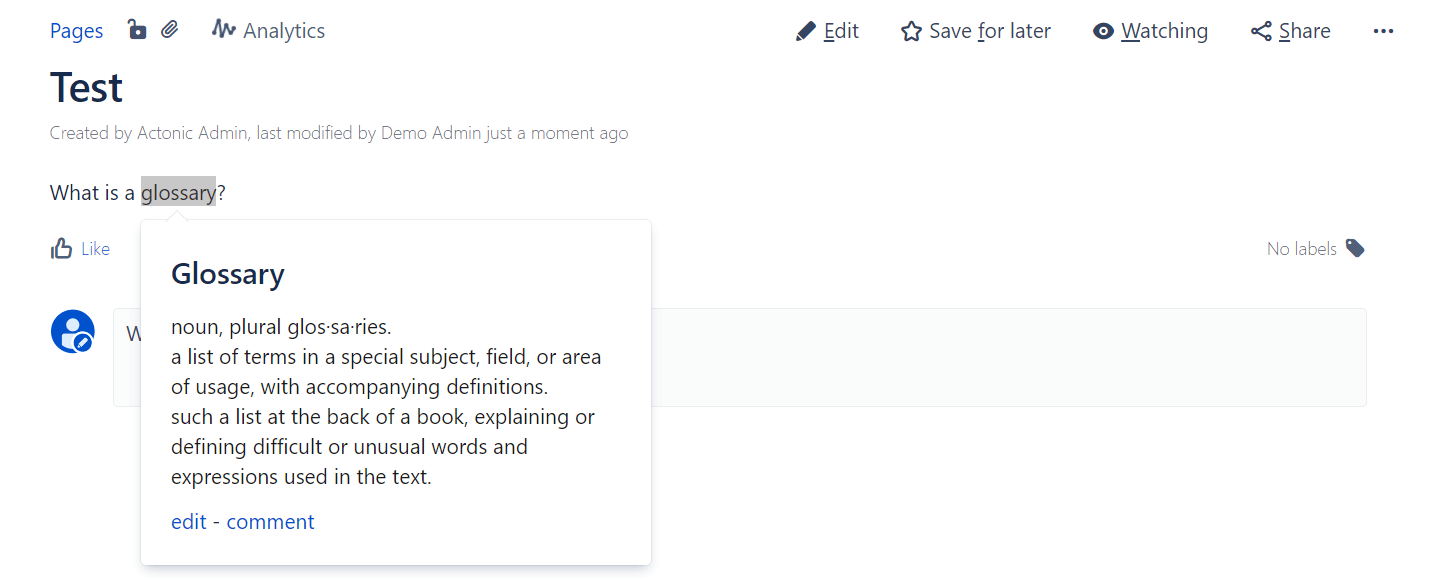
13. Now when we type a sentence like this on a page and highlight it, we see this button:

 14. If we click on it, we will see a definition that we can edit or comment on.