Time tracking for agile projects 🕒
Agile project management only unfolds its full potential with accurate time tracking. Whether you use Scrum, Kanban, or other agile frameworks, Jira Software from Atlassian integrates seamlessly into your workflows and supports you in your task planning. Although Jira Software was originally developed for software teams, 50% of all Jira users now use the software for non-IT projects.
Project managers in all industries face the same challenge: providing realistic estimates of their team’s work time. Time tracking is the cornerstone for making informed decisions in agile projects. With detailed records, teams can define targeted deadlines, plan future sprints and iterations, and resources in the best possible way.
Jira helps you do this.
When should you use a Jira time tracking report? 📈
Jira has a native time tracking feature, so you can optimize your time management for your projects and create reports for your stakeholders. Below are some situations where you will benefit immensely from time tracking in Jira:
-
Accurate invoicing and transparent communication: with Jira time tracking, you can record exactly how much time you spend on projects. This makes it easier to invoice customers and makes your achievements more transparent.
-
Efficient task management: When you know how much time is needed for specific tasks, you can better plan and delegate tasks and projects. This leads to a more efficient workflow in Jira.
-
Performance analysis and targeted feedback: With Jira time tracking, you can analyze your team’s performance and provide valuable feedback. This helps you increase productivity and achieve set goals.
-
Clear insights with visual reports: Tracking your working time allows you to create clear, easy-to-understand reports about your activities. This allows you to show stakeholders and colleagues exactly how you’re using your time in Jira.
-
Accurate delivery estimates: Project delivery estimates can be difficult, but with Jira time tracking, you have realistic data at your fingertips. So you can set accurate delivery times based on actual experience and drive your project management.
-
Easy and versatile integrations: Jira offers a wide range of integrations that allow you to seamlessly integrate your time tracking into your workflow. This allows you to streamline your Jira time tracking and use it even more effectively.
These benefits turn your Jira time tracking into a powerful tool for improving your agile processes and the success of your business.
How do I set up native time tracking in Jira? 🛠️
To make sure your project management takes off, you should first set up native time tracking in Jira. Here’s how to go about it:
Log in
First things first: We assume that you already have Jira Software installed and are using it. Once you’ve logged in with your Atlassian account, you’re ready to move on to tracking time in Jira.
Enable time tracking
In Jira Cloud, the time tracking option is always enabled. However, you need to add the time tracking field to each issue type. To do this, you need Jira admin rights.
-
Navigate to a project
2. Click on “Project settings” and then “Issue types”
3. Select an issue type, for example “Story” and add the “Time Tracking” field
4. The “Time Tracking” field will now appear in your Jira ticket
5. Repeat this process for every single issue type
Please keep in mind that the users in your project who should track the working time also need the “Work on Issue” permission.
The global time tracking feature is enabled by default in Jira. However, if you are having trouble following the steps above, it may have been (accidentally) turned off. To re-enable it, go to the administration interface of a project and select “Time Tracking” in the sidebar under “Issue Features” and save your changes here.
Tracking working time for the first time in Jira
Congratulations, your issue types have the appropriate fields, now you can track your work time directly in the Jira ticket.
-
Create a Jira ticket that you want to work on
-
and click in the “Time tracking” field.
-
A pop up will open immediately. Here, please enter the working time and the description of your activity and confirm with “Save”.
As you can see, the native method of Jira time tracking works. However, it can still be challenging, especially for admins who need to manage multiple projects and task types.
Also, how good are you at counting? The native Jira time tracking tool only allows you to track working time manually. You have to capture the start and end time of your activity yourself, then calculate the total time and enter it manually.
Disadvantages of the native Jira time tracking 📉
-
Limited customization options
-
Lack of integration with other tools
-
Limited reporting capabilities
-
Complex projects are not well supported
-
No capacity-based resource management
-
Lack of automation, only manual input
-
Difficulty with task monitoring
-
Limited flexibility with overtime and vacation
-
No advanced options for data protection
Jira time tracking plug-ins 💡
To track time or not to track time is no longer the question. Rather, this one is: What’s the most effective way to do it? If you use Jira’s native time tracking for a while, you will quickly realize the above limitations. That’s why there are plenty of time tracking tools available on the Atlassian Marketplace to make your (work) life easier.
The problem: searching for “time tracking” in the Marketplace, you will find 190 apps. To save you time and nerves, we compared the most popular and top-rated time management apps based on the most concise features. Discover the results here: Jira time tracking apps in the ultimate 2022 comparison.
One of the best time tracking tools for Jira is Timesheet Builder. This multi-functional Jira plug-in works seamlessly with the Jira platform and incidentally makes it easier for you to comply with privacy and corporate policies.
Time tracking in Jira with Timesheet Builder
One of the many advantages of Timesheet Builder is its automated time tracking. Here, you don’t have to go through the hassle of calculating your working hours with pen and paper. A start button directly in the Jira ticket takes care of the effort for you, so you can continue working in an agile manner.
Furthermore, work logs can be stored separately in a privacy-compliant database, so they are not visible in the task history or activity history of a Jira ticket.
Enable secured work logs 🔐
Just this much we want to say about the configuration of Timesheet Builder: To fully enjoy privacy-compliant time tracking, you need to enable “Secured Worklogs” as a global Jira admin.
A small step for you, an immense security boost for your team members’ sensitive data. Because, thanks to Timesheet Builder’s “Secured Worklogs”, such an activity log becomes:
You can find a more detailed description of all the benefits here: How to ensure secure time tracking with Jira.
Track working hours with Timesheet Builder step by step
-
Open the Jira Issue you want to work on
-
Press the “start” button of the timer
3. Do great work without having to keep time in mind
4. When you are done, press “Stop” and enter the description of your work time
The timer feature is just one of several ways to track your work time with Timesheet Builder. Drag-and-drop of tickets into your timesheet is also possible. Discover more ways to track your working time in our documentation.
Create timesheets automatically
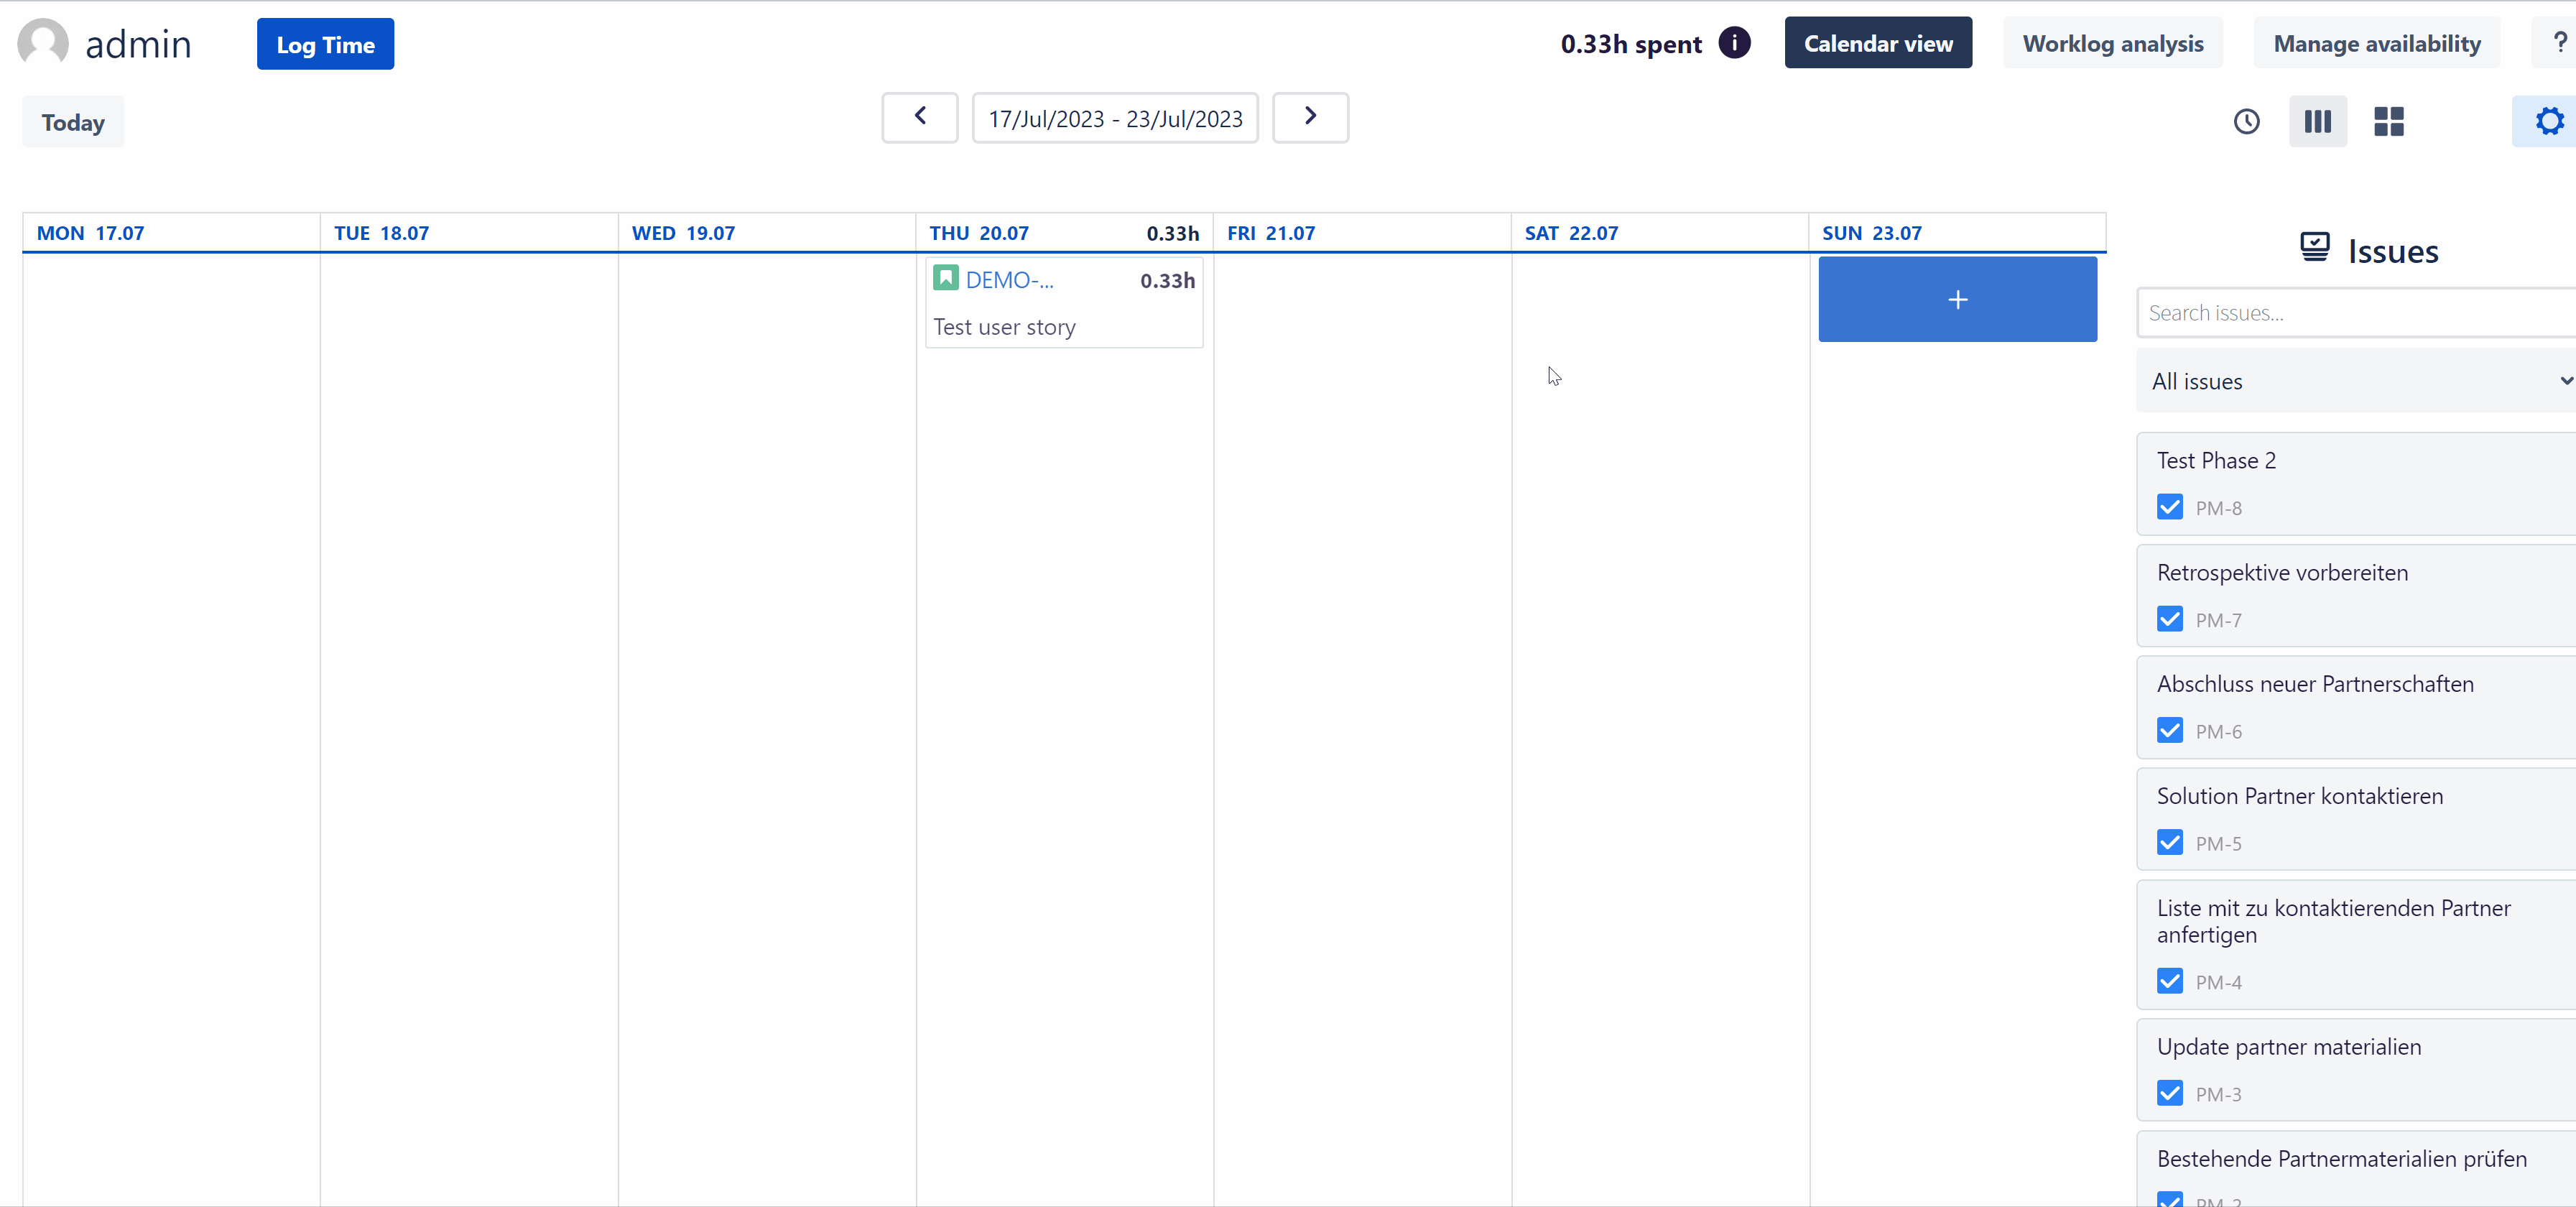
As soon as you track your working time in the Jira ticket, it is automatically saved in the “My timesheet” section of the app. This is where you can see on which day, at what time, you have completed which tasks.
In addition to the calendar view, there is also the one for tracked working time. At this point, you can easily filter by projects, issues, or criteria such as “billable” and “non-billable” time.
Track billable working time in Jira 💰
Why you should track your billable hours in Jira and how to do it quickly and easily is explained in detail in our article: How to track billable hours and increase profitability.
However, we want to mention here: With no other Jira time tracking tool can you ensure both billability and data protection at the same time. A toggle feature allows you to track time worked as billable or not.
In the Jira ticket, you can distinguish billable from non-billable working hours by the dollar symbol.
Schedule absence in the Jira calendar 📅
A big disadvantage of native time tracking in Jira is the absence of a (clear) calendar. With Timesheet Builder, you can easily enter your personal scheduled absences at “Manage availability”. For example, if you have every other Friday off, only work half days on Wednesdays, and have vacation: This is the place to clearly display your absences.
Advantages of Jira time tracking with Timesheet Builder
Timesheet Builder was developed due to high customer demand for a simple, powerful, and privacy-compliant Jira time tracking tool. Moreover, the integration with its sibling app Report Builder is great for agile reporting directly in your Jira dashboard!
Advantages of Timesheet Builder at a glance
✅ Timer function for automated time tracking
✅ Drag-and-drop time tracking
✅ Schedule personal absences in the calendar
✅ Create and manage teams easily
✅ Clear overview of (team) capacities
✅ Advanced data protection features (visibility of work logs)
✅ Reports in Jira with the Report Builder integration
✅ Basis for capacity-based resource management
✅ Track billable work time
Time tracking in Jira for your success 🏆
Time tracking is crucial for an organization, especially for agile work processes and realistic estimations. To overcome the limitations of native Jira time tracking and run a successful project management, we developed Timesheet Builder.
Satisfied customers
As you can see, many customers are already convinced by Timesheet Builder. When will you use the unique time tracking tool to unfold your full potential?


 see it")
")