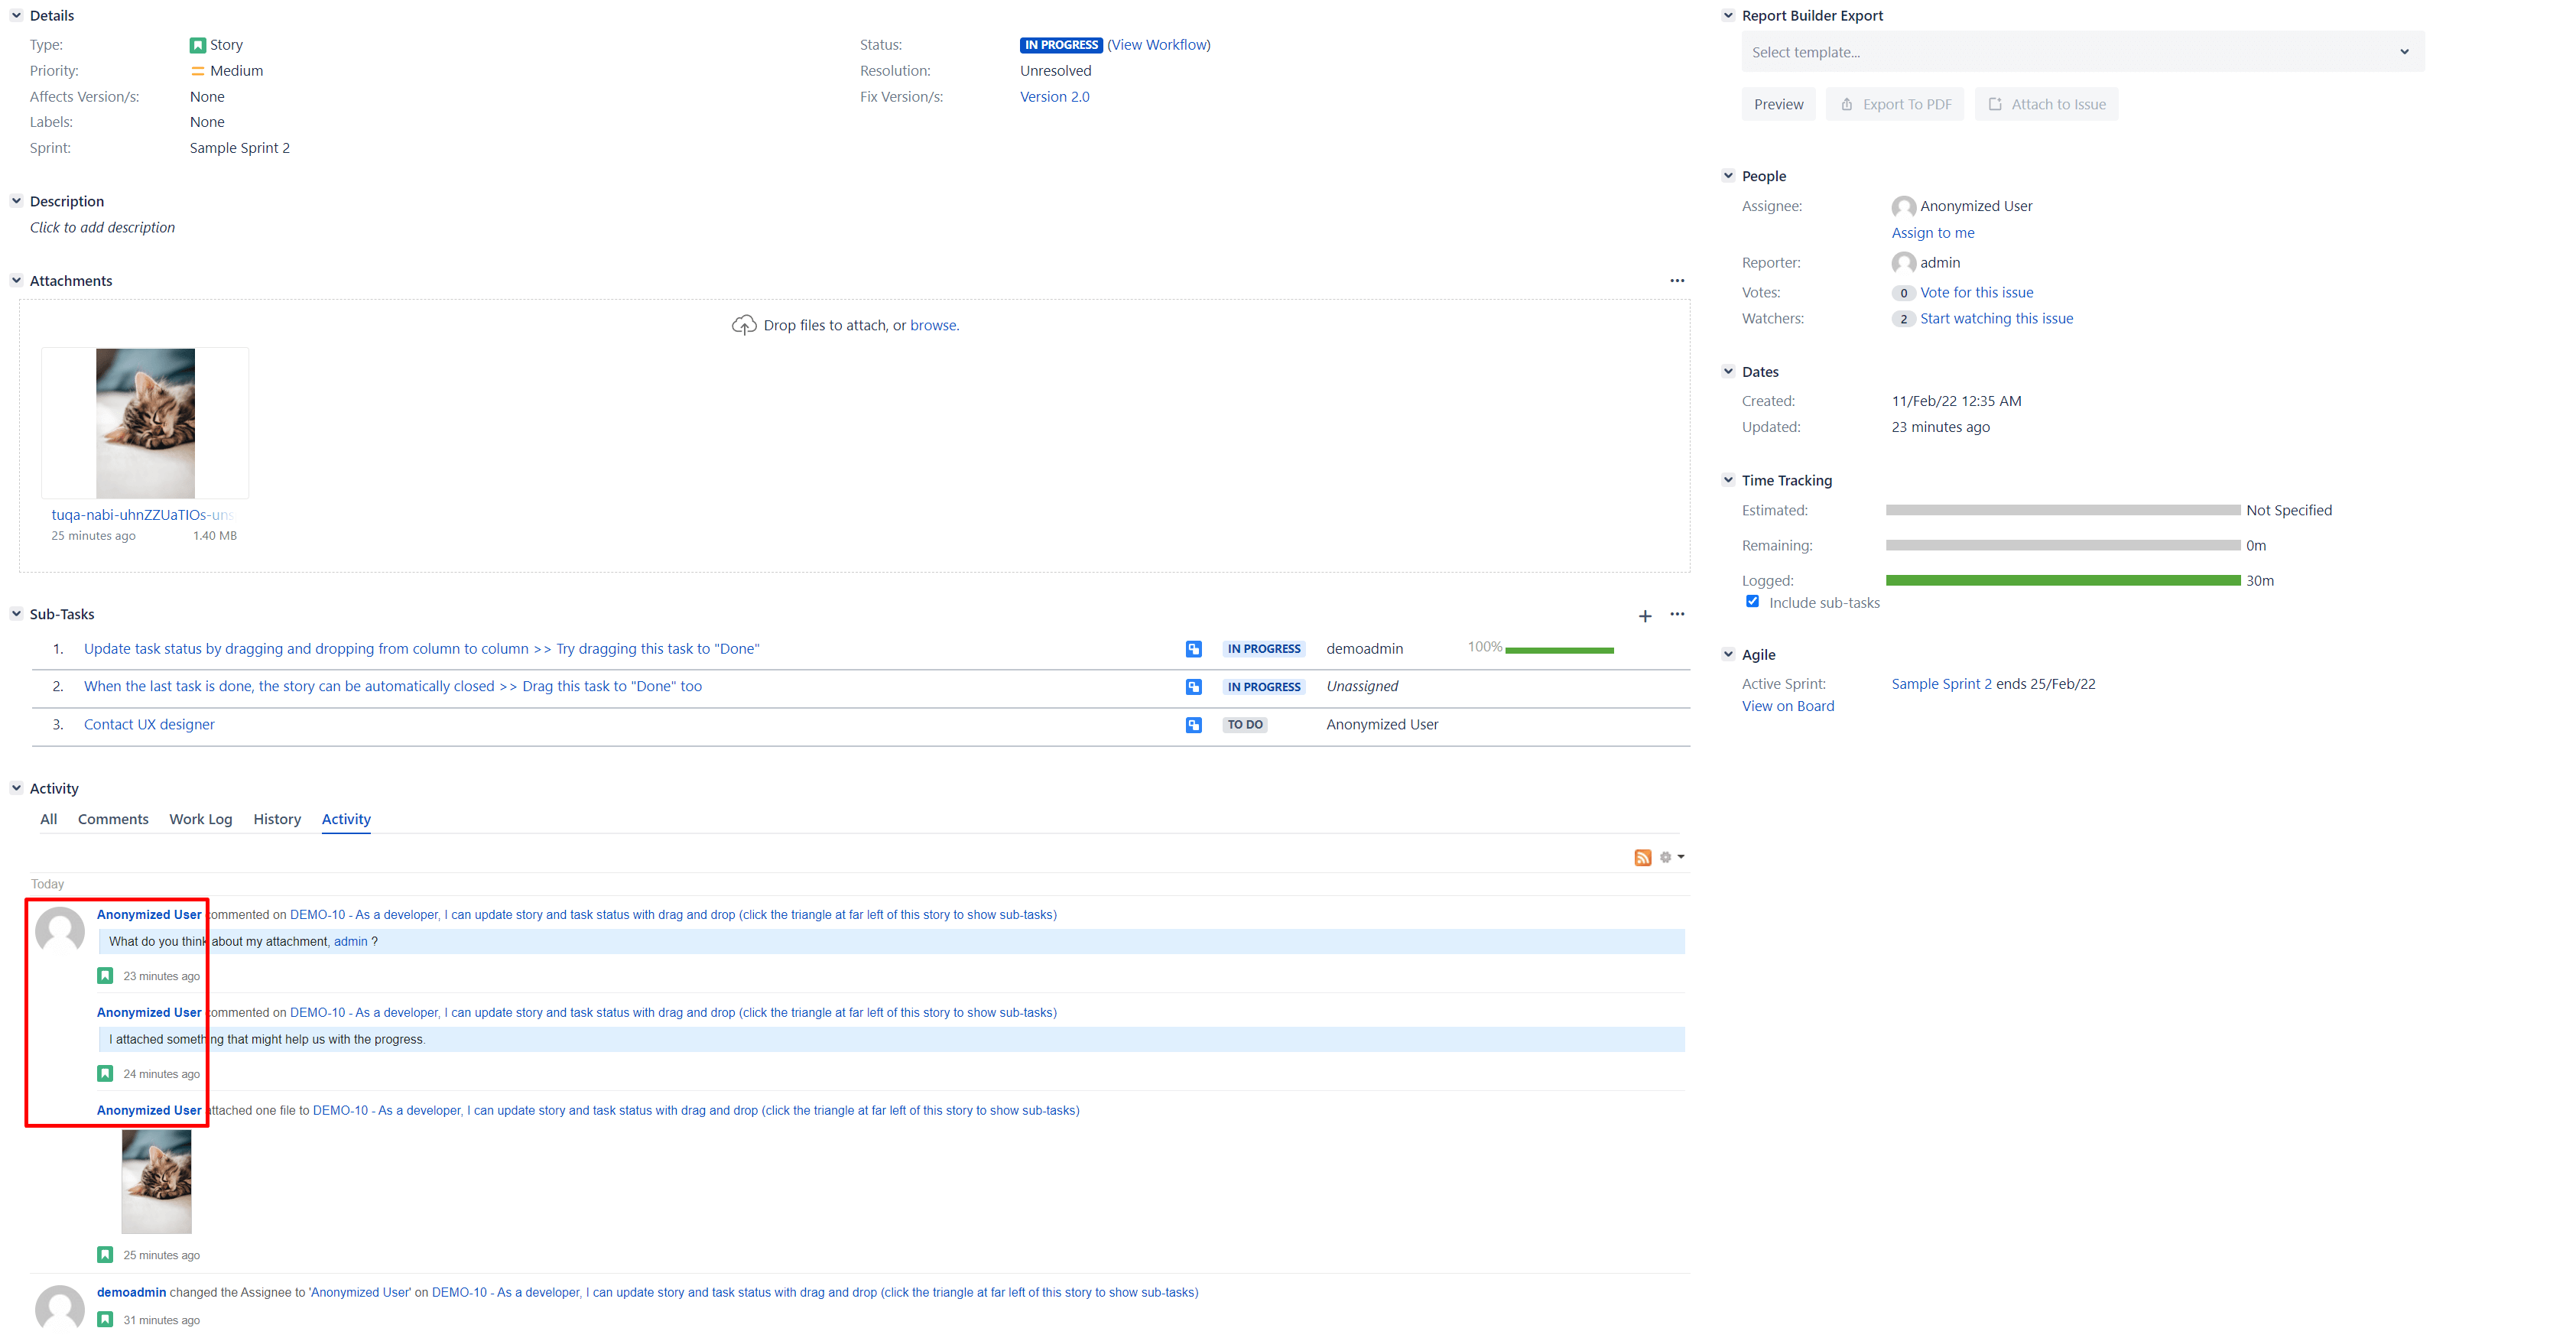
To anonymize a Jira user to ensure the “Right to be forgotten” or other rules, you could either:
-
delete everything, but then you lose all the information you probably need to keep, or
-
manually search everything and spend lots of time on manual execution, or
-
use the easy interface of Data Protection and Security Toolkit for Jira.
We’ll show the ultimate Jira user anonymization guide you always wanted to have. Read more on how to succeed with the third option and save time and minimize error rates with our solution.
How to anonymize Jira users video tutorial
In the mood for a great tutorial? Here, you’ll find all the steps for your Jira user anonymization explained:
The ultimate guide for Jira user anonymization
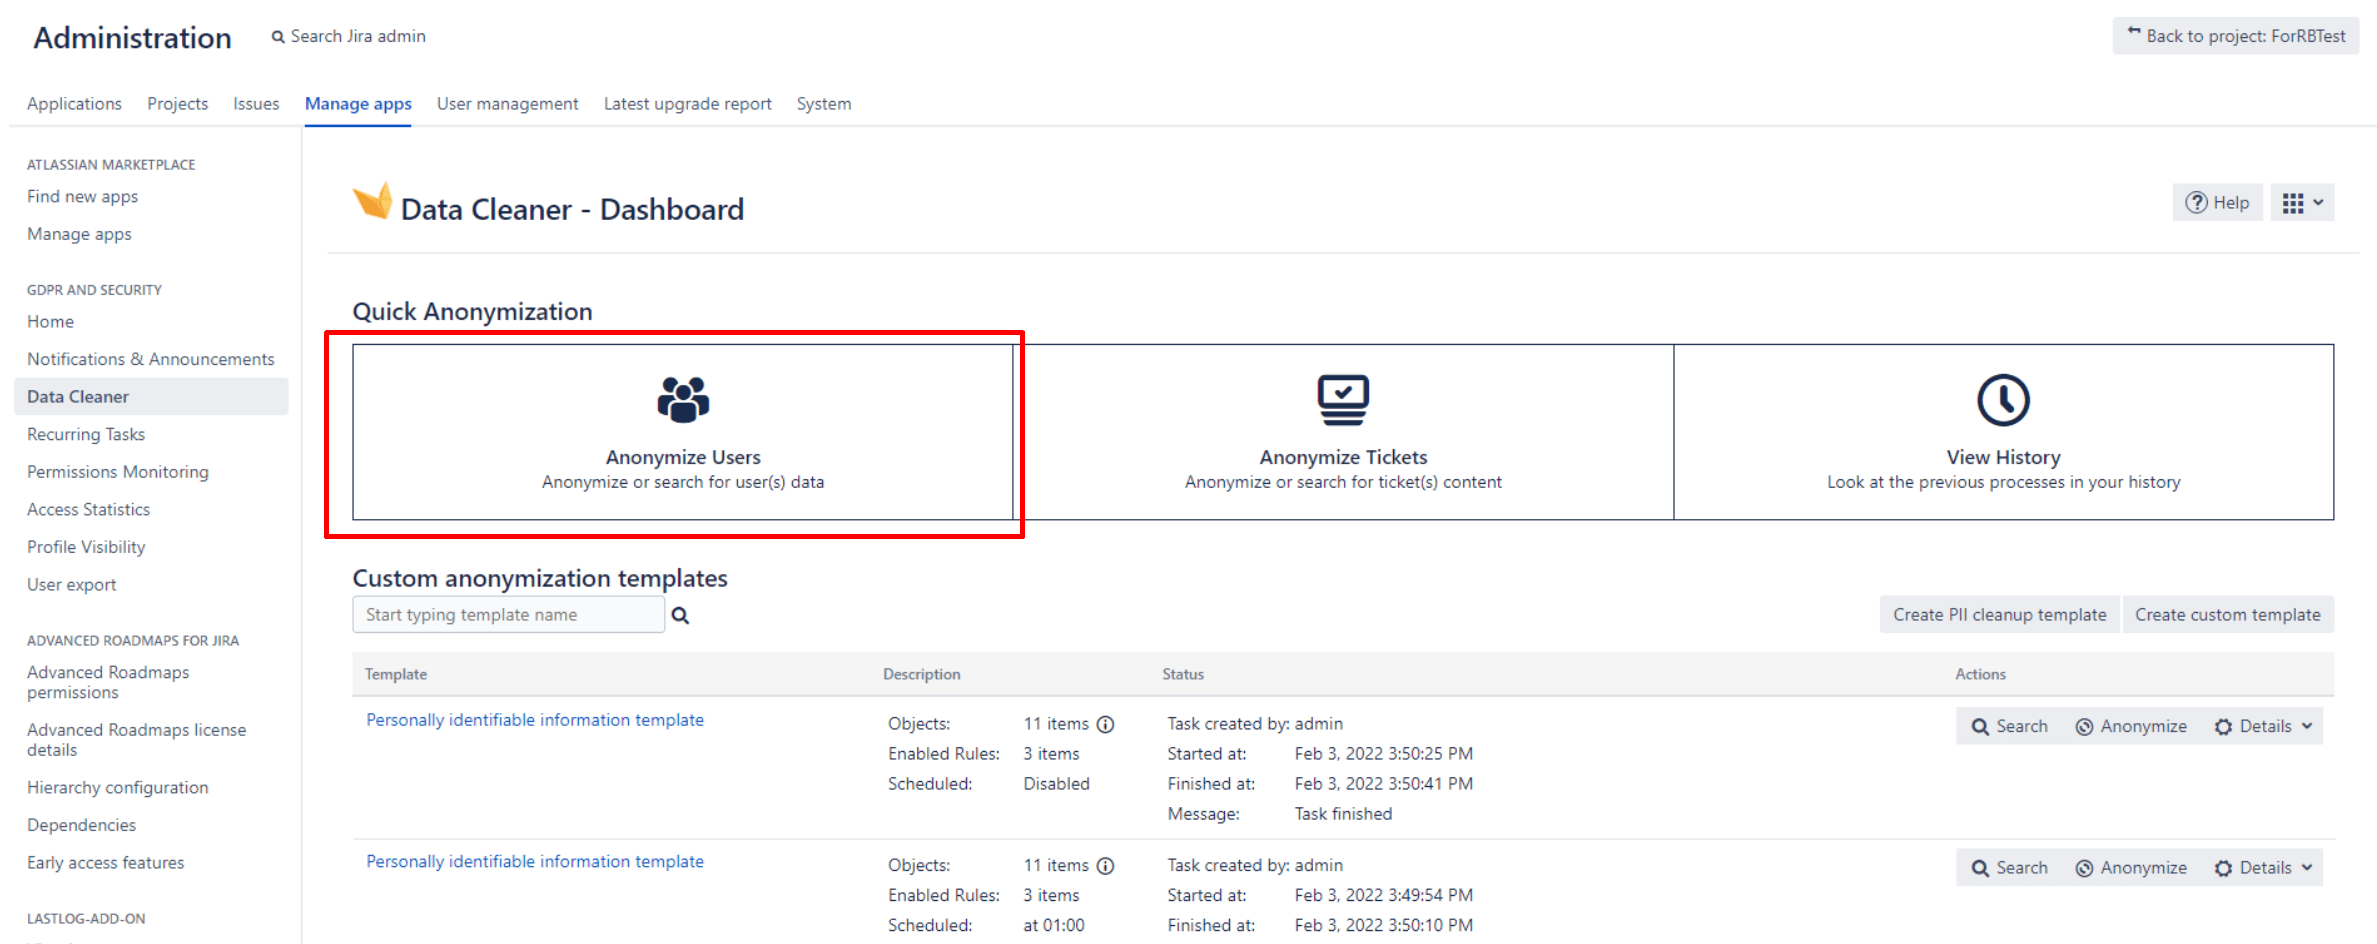
Step 1: Open the Data Cleaner Dashboard and select Anonymize Users.
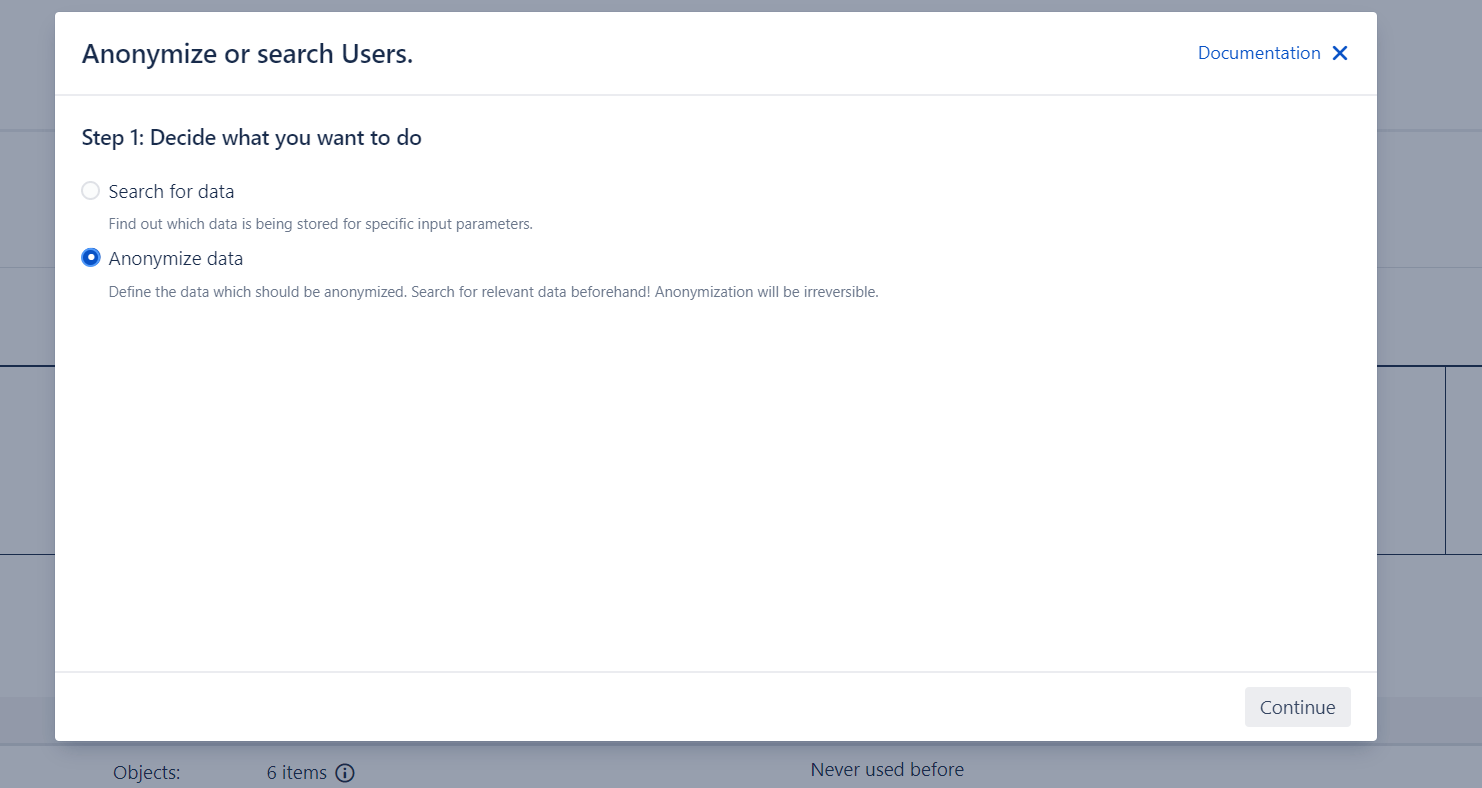
Step 2: In the next screen, click on Anonymize data.
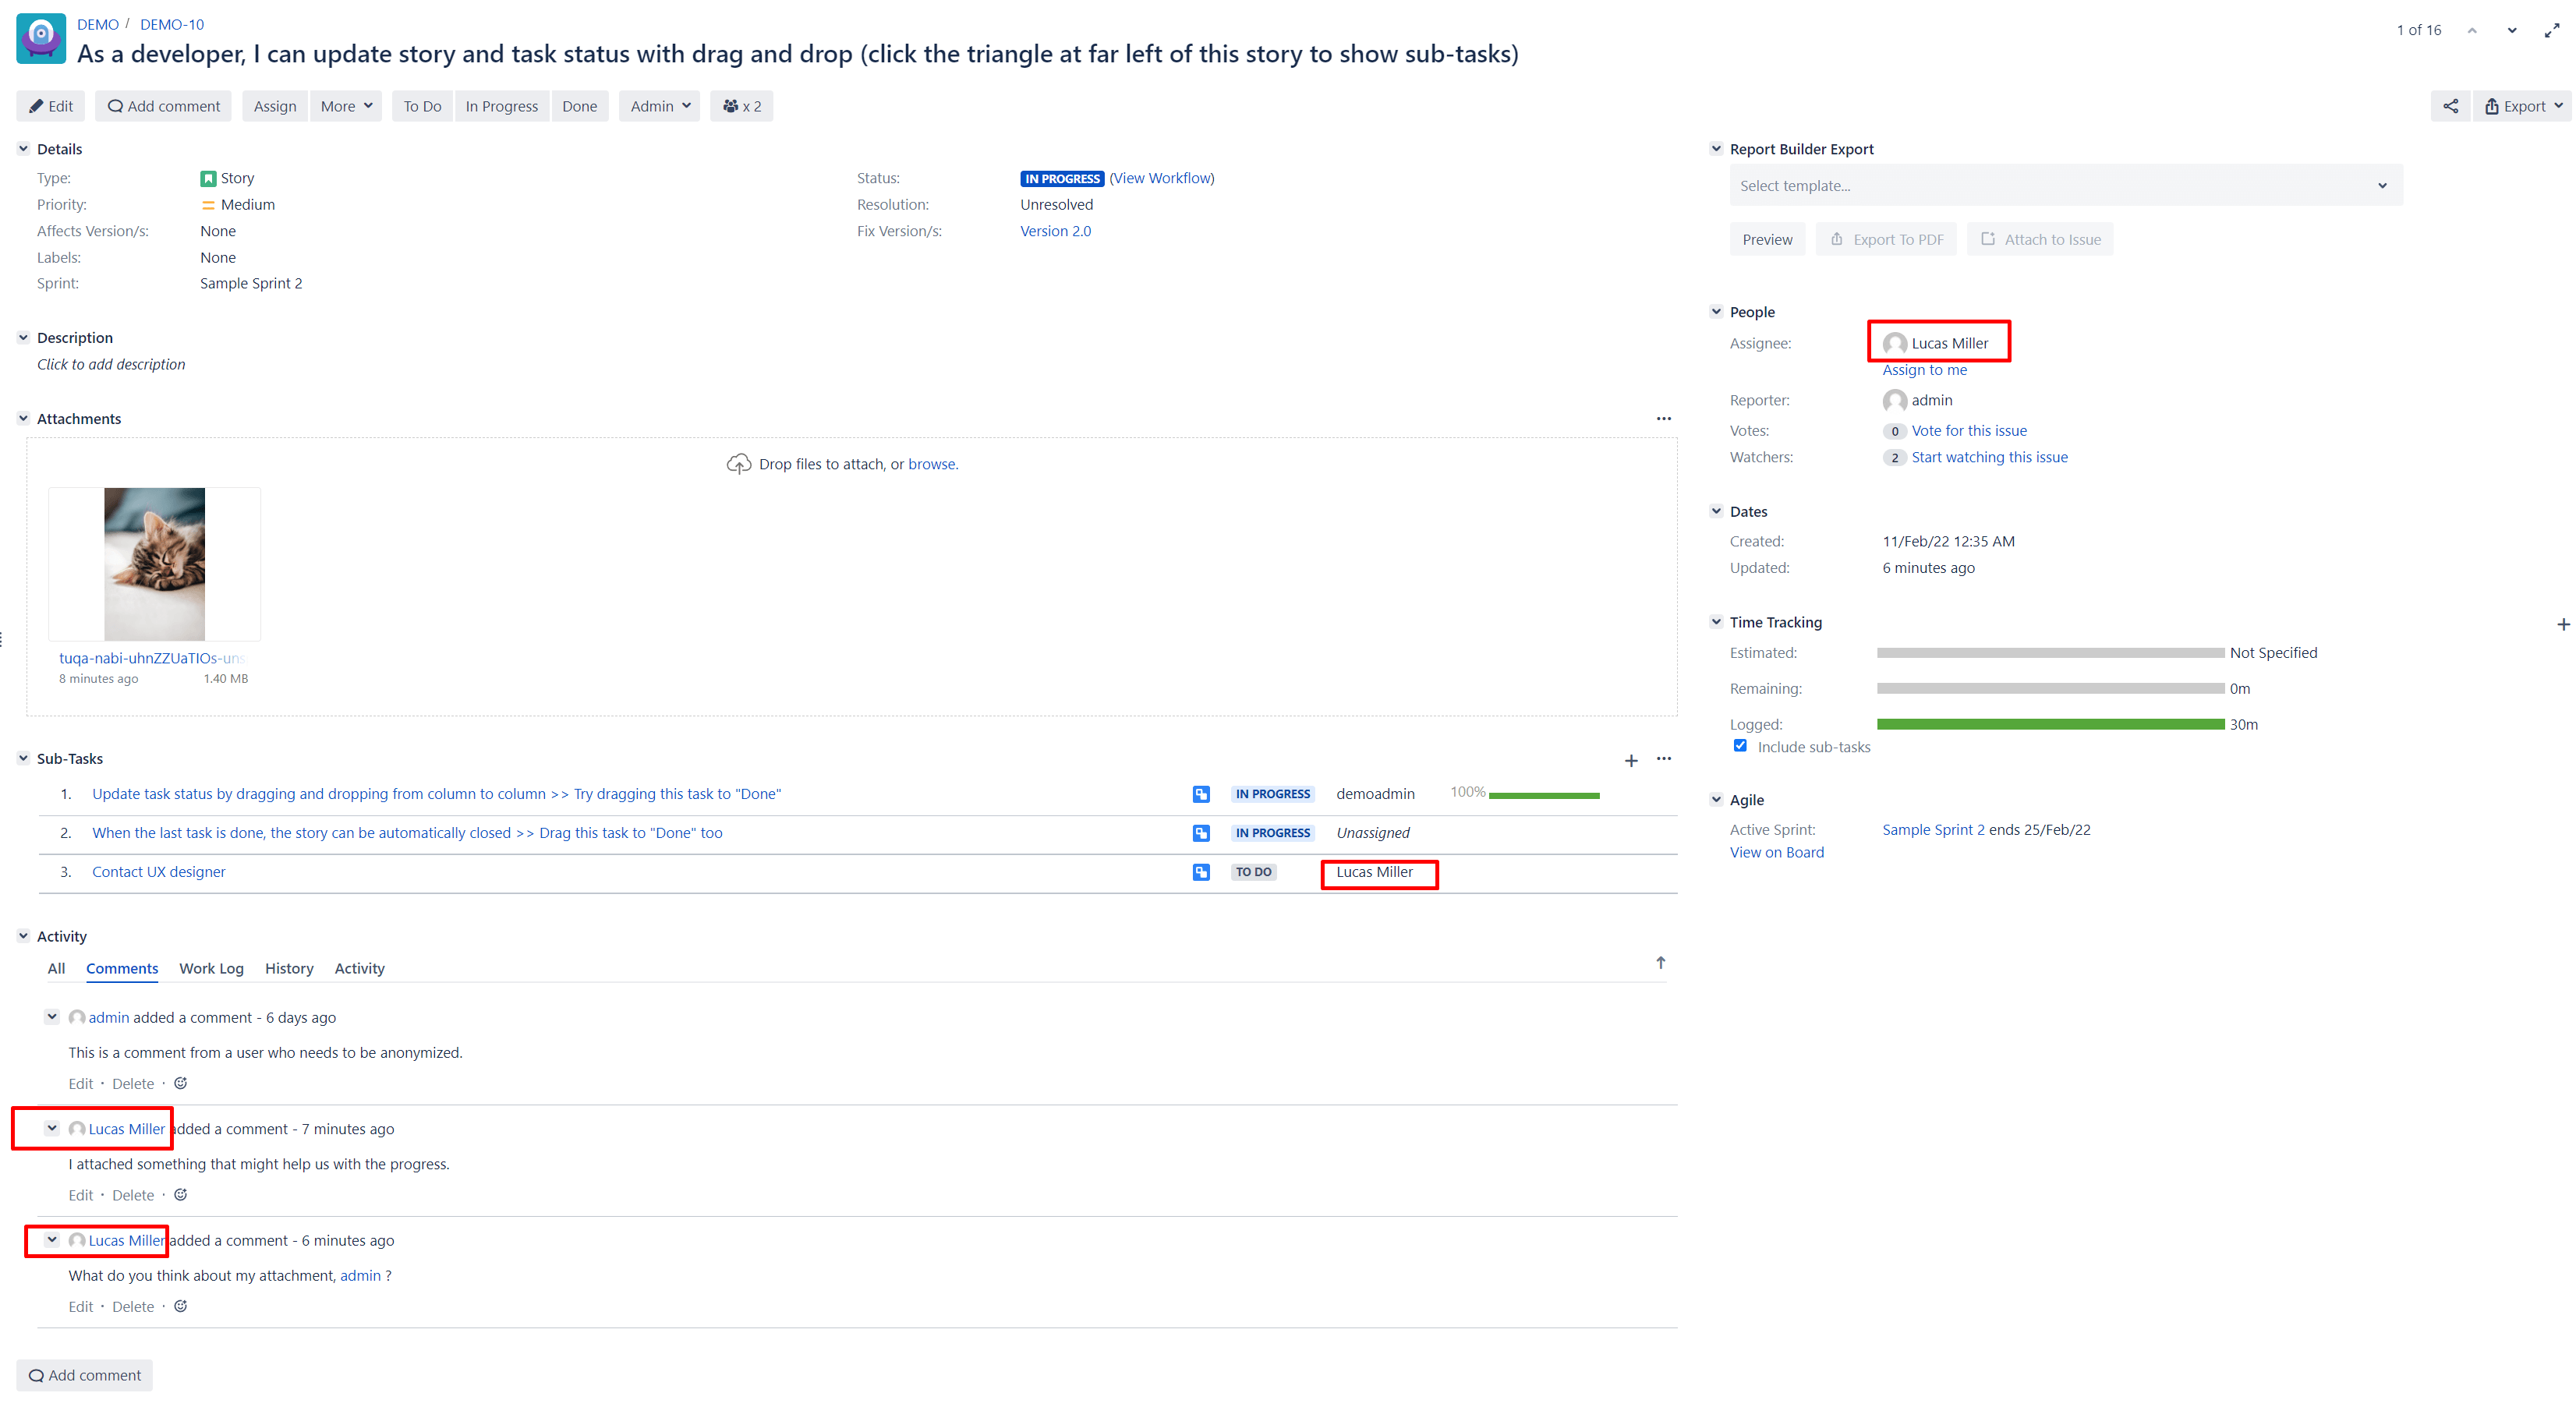
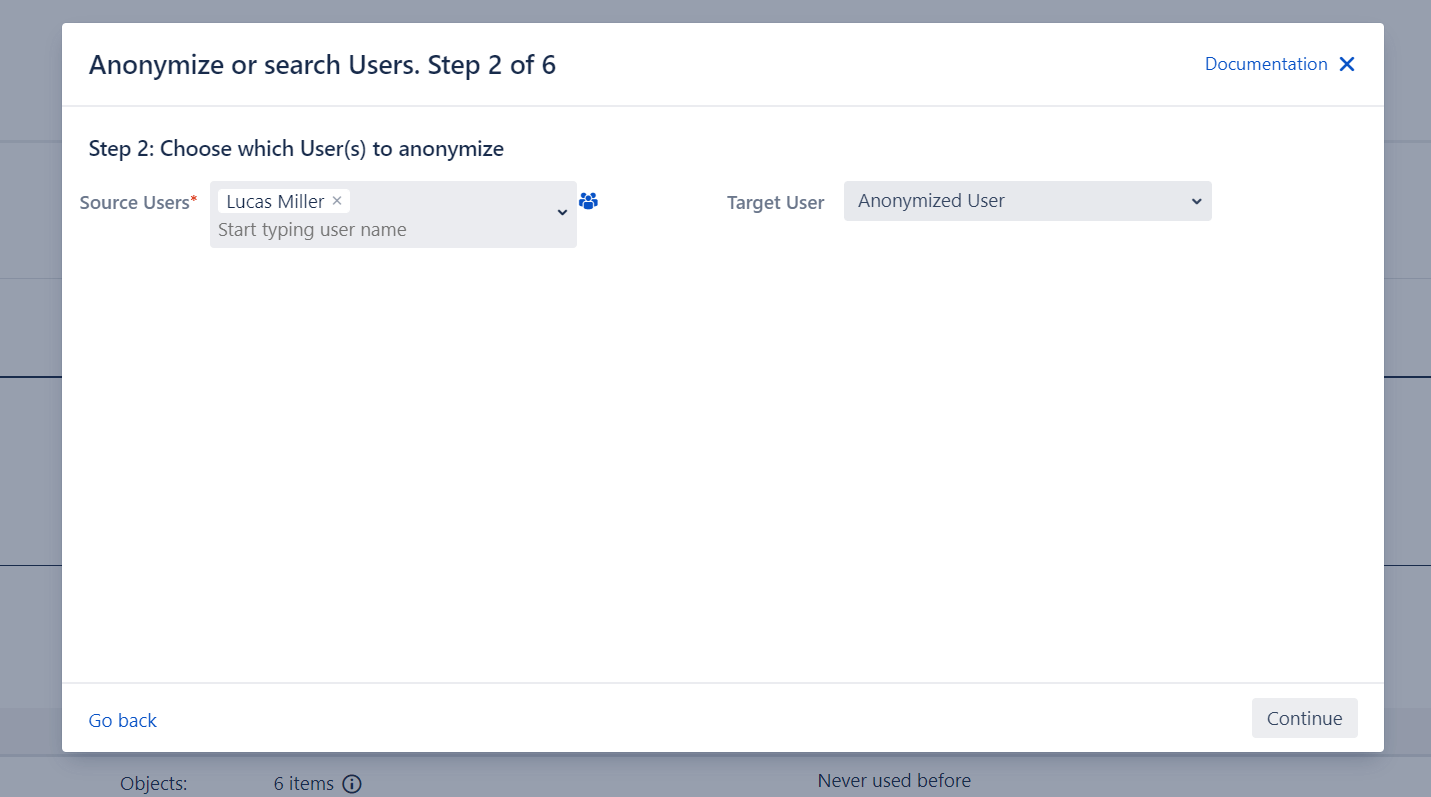
Step 3: Then, you can start typing any User’s name to select the Source user, the person whose content you want to anonymize (in our example: Lucas Miller, the hardworking guy). You can also select already deactivated users – not that easy with the Jira out-of-the-box solution!
Thereafter, you can choose a Target user to take the place of the Source user after anonymization.
As Target User, you can either select an already existing user, or you can create your own dummy user, which will then take over the ownership.
Click on Continue.
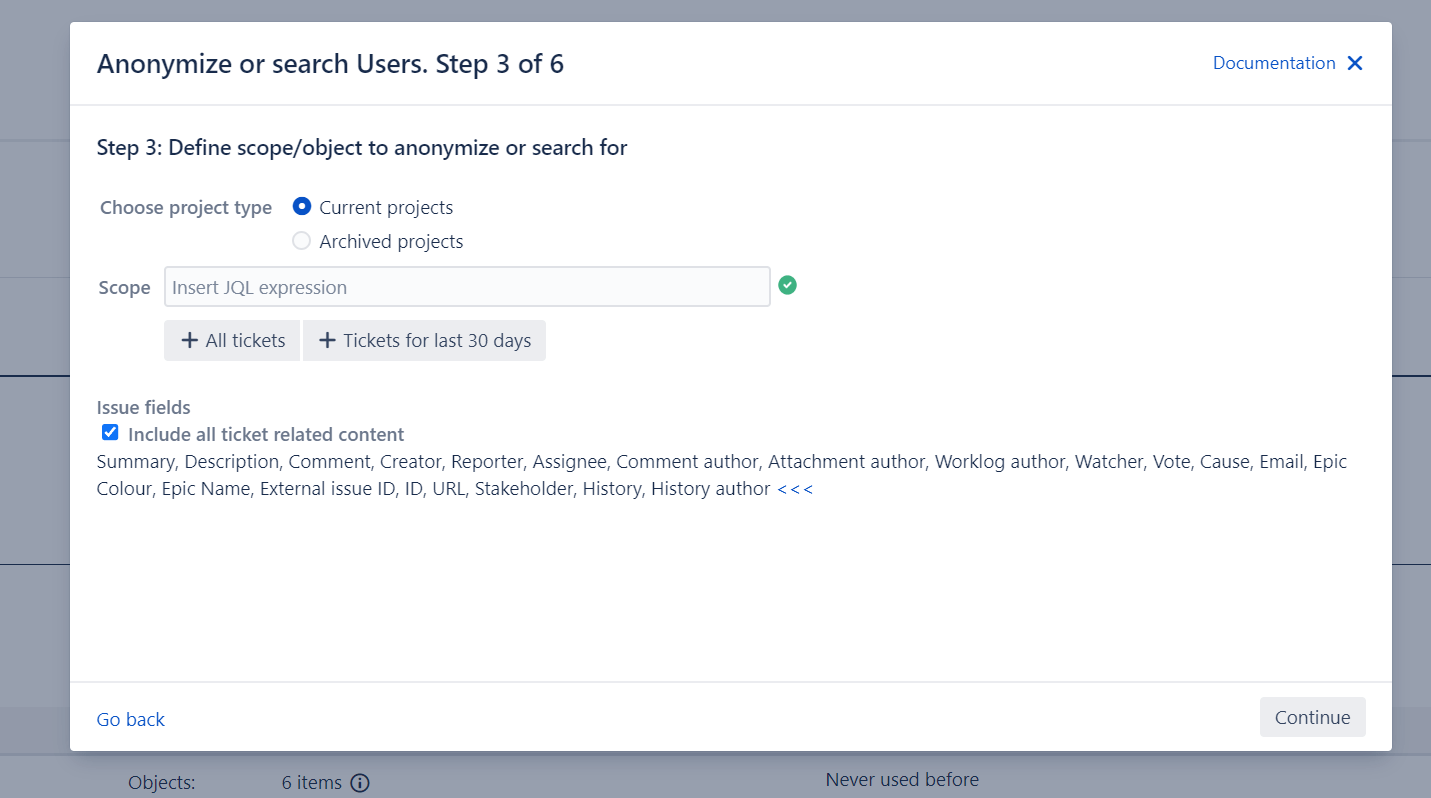
Step 4: Now, you can either select projects that are already archived, or you select from the current projects. For Current projects, you also have the option to define the Scope of the projects, which will then be anonymized. Make sure to hit the checkmark to Include all ticket related content, to not miss any relevant content.
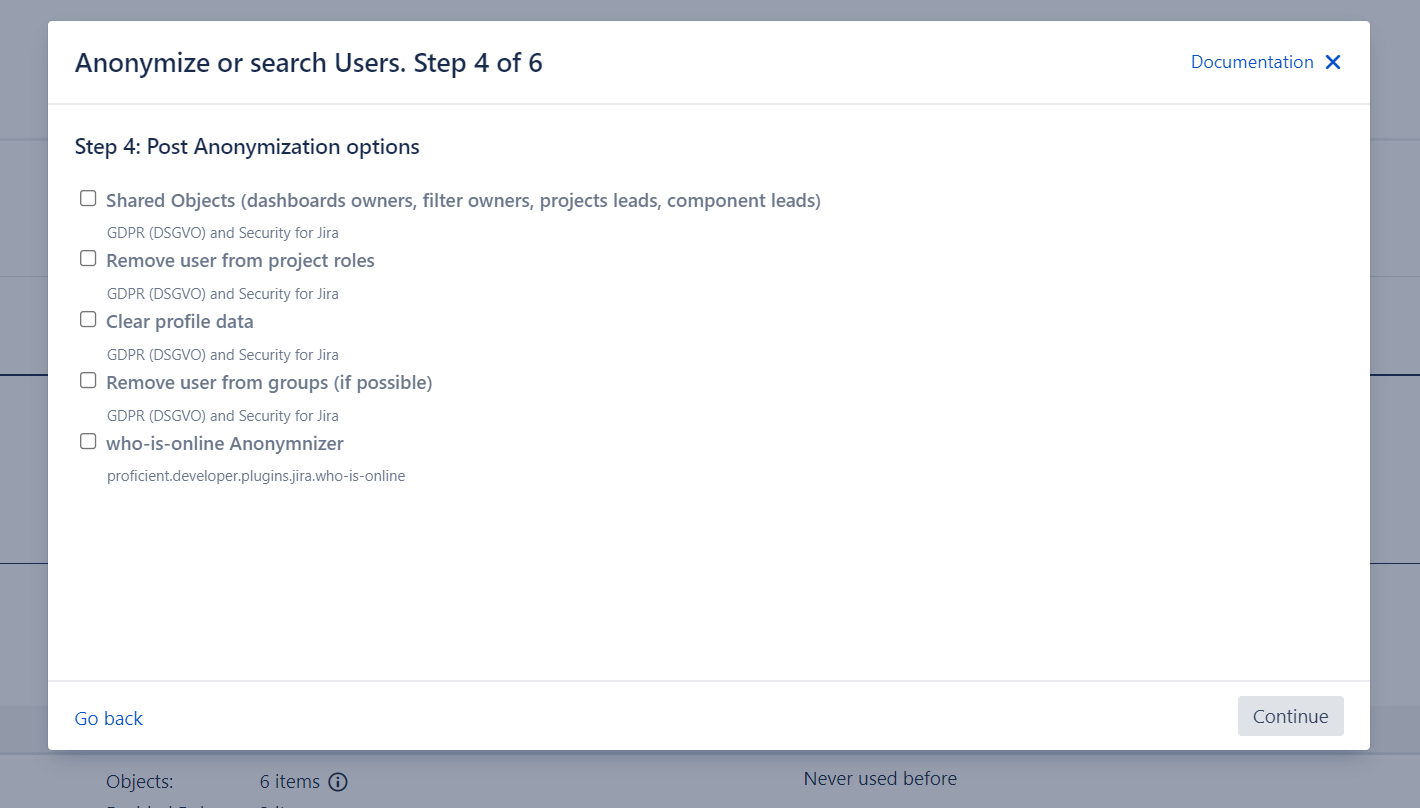
Step 5: In this step, you’re able to pick some post anonymization options. For example, if you want to clear the profile data and remove the user from all groups, you simply have to activate the checkmarks. And our tool will take care of everything.
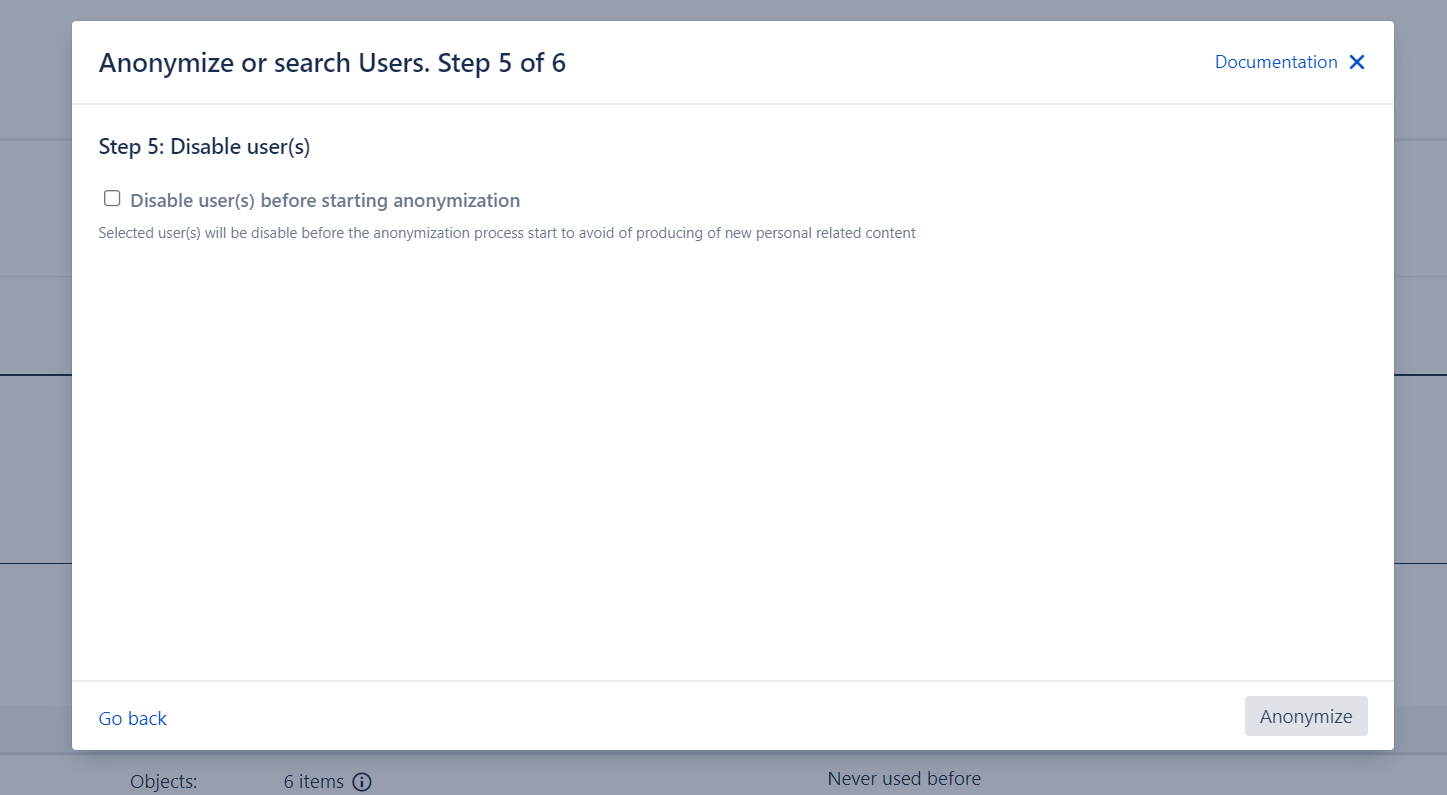
Step 6: If you want to disable the selected user before the anonymization starts, here’s the point to do so. Then, click on Anonymize.
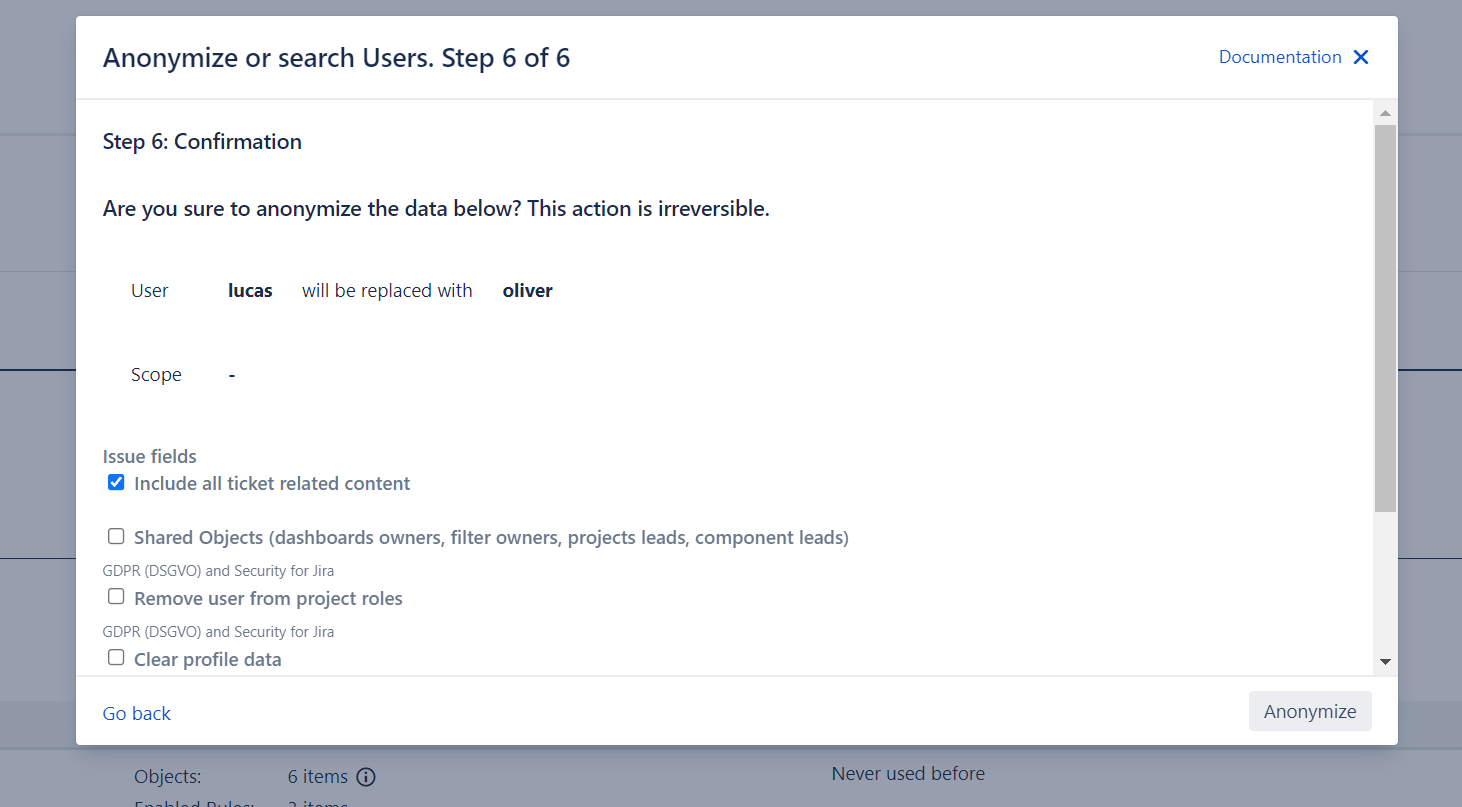
Schritt 7: Bevor der Prozess beginnt, geben wir Ihnen einen Überblick über alles, was danach passieren wird. Sie können transparent nachvollziehen, welche*r Nutzer*in durch welche*n Nutzer*in ersetzt wird und welchen Umfang Sie für das Projekt gewählt haben.
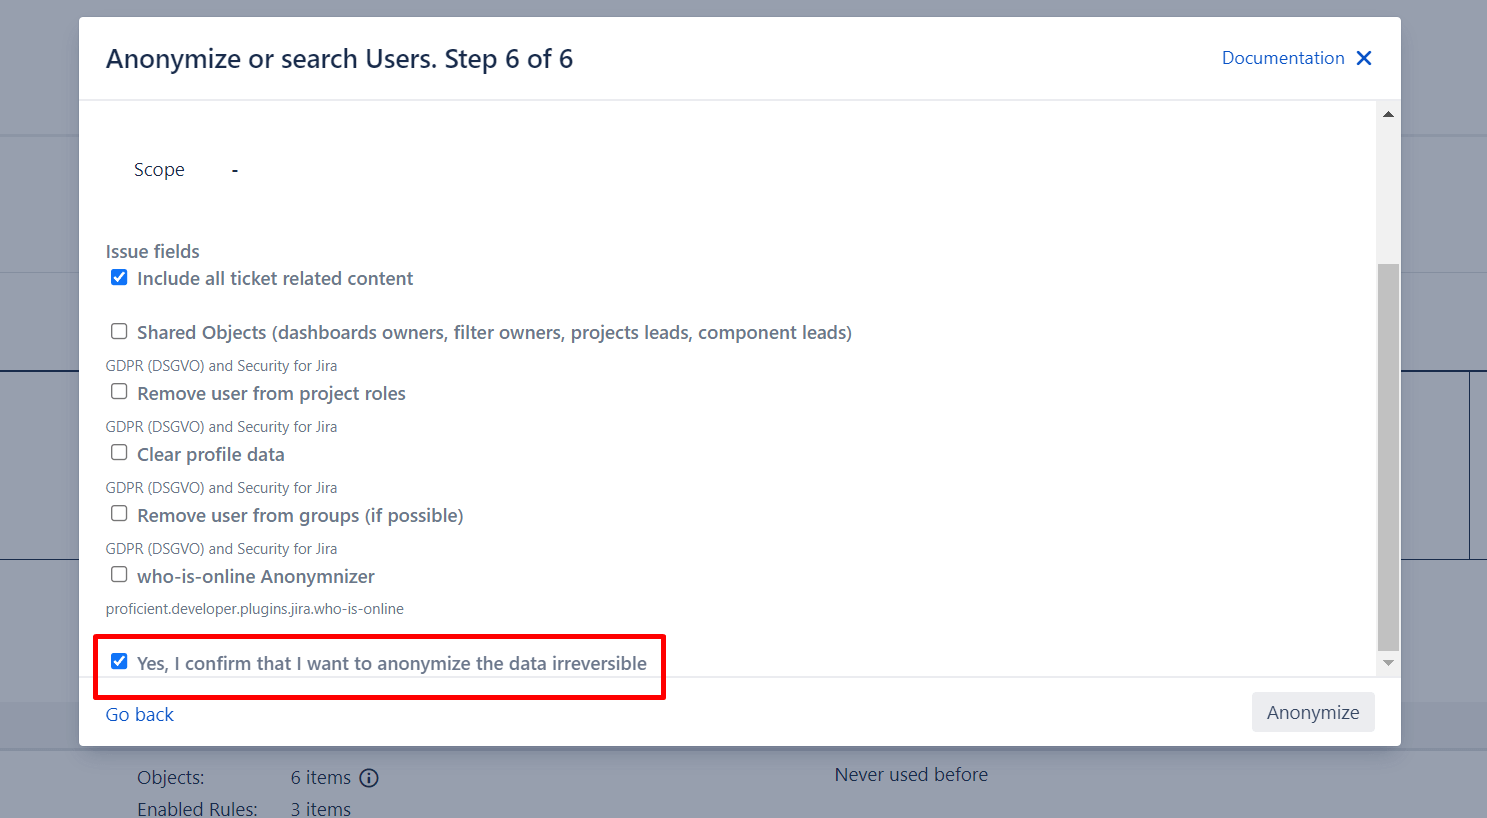
Please keep in mind that anonymization cannot simply be undone. Only if you are absolutely sure about this process, you should perform the anonymization.
At this point, it is necessary to check the box Yes, I confirm that I want to anonymize the data irreversibly.
Hit Anonymize to start the process.
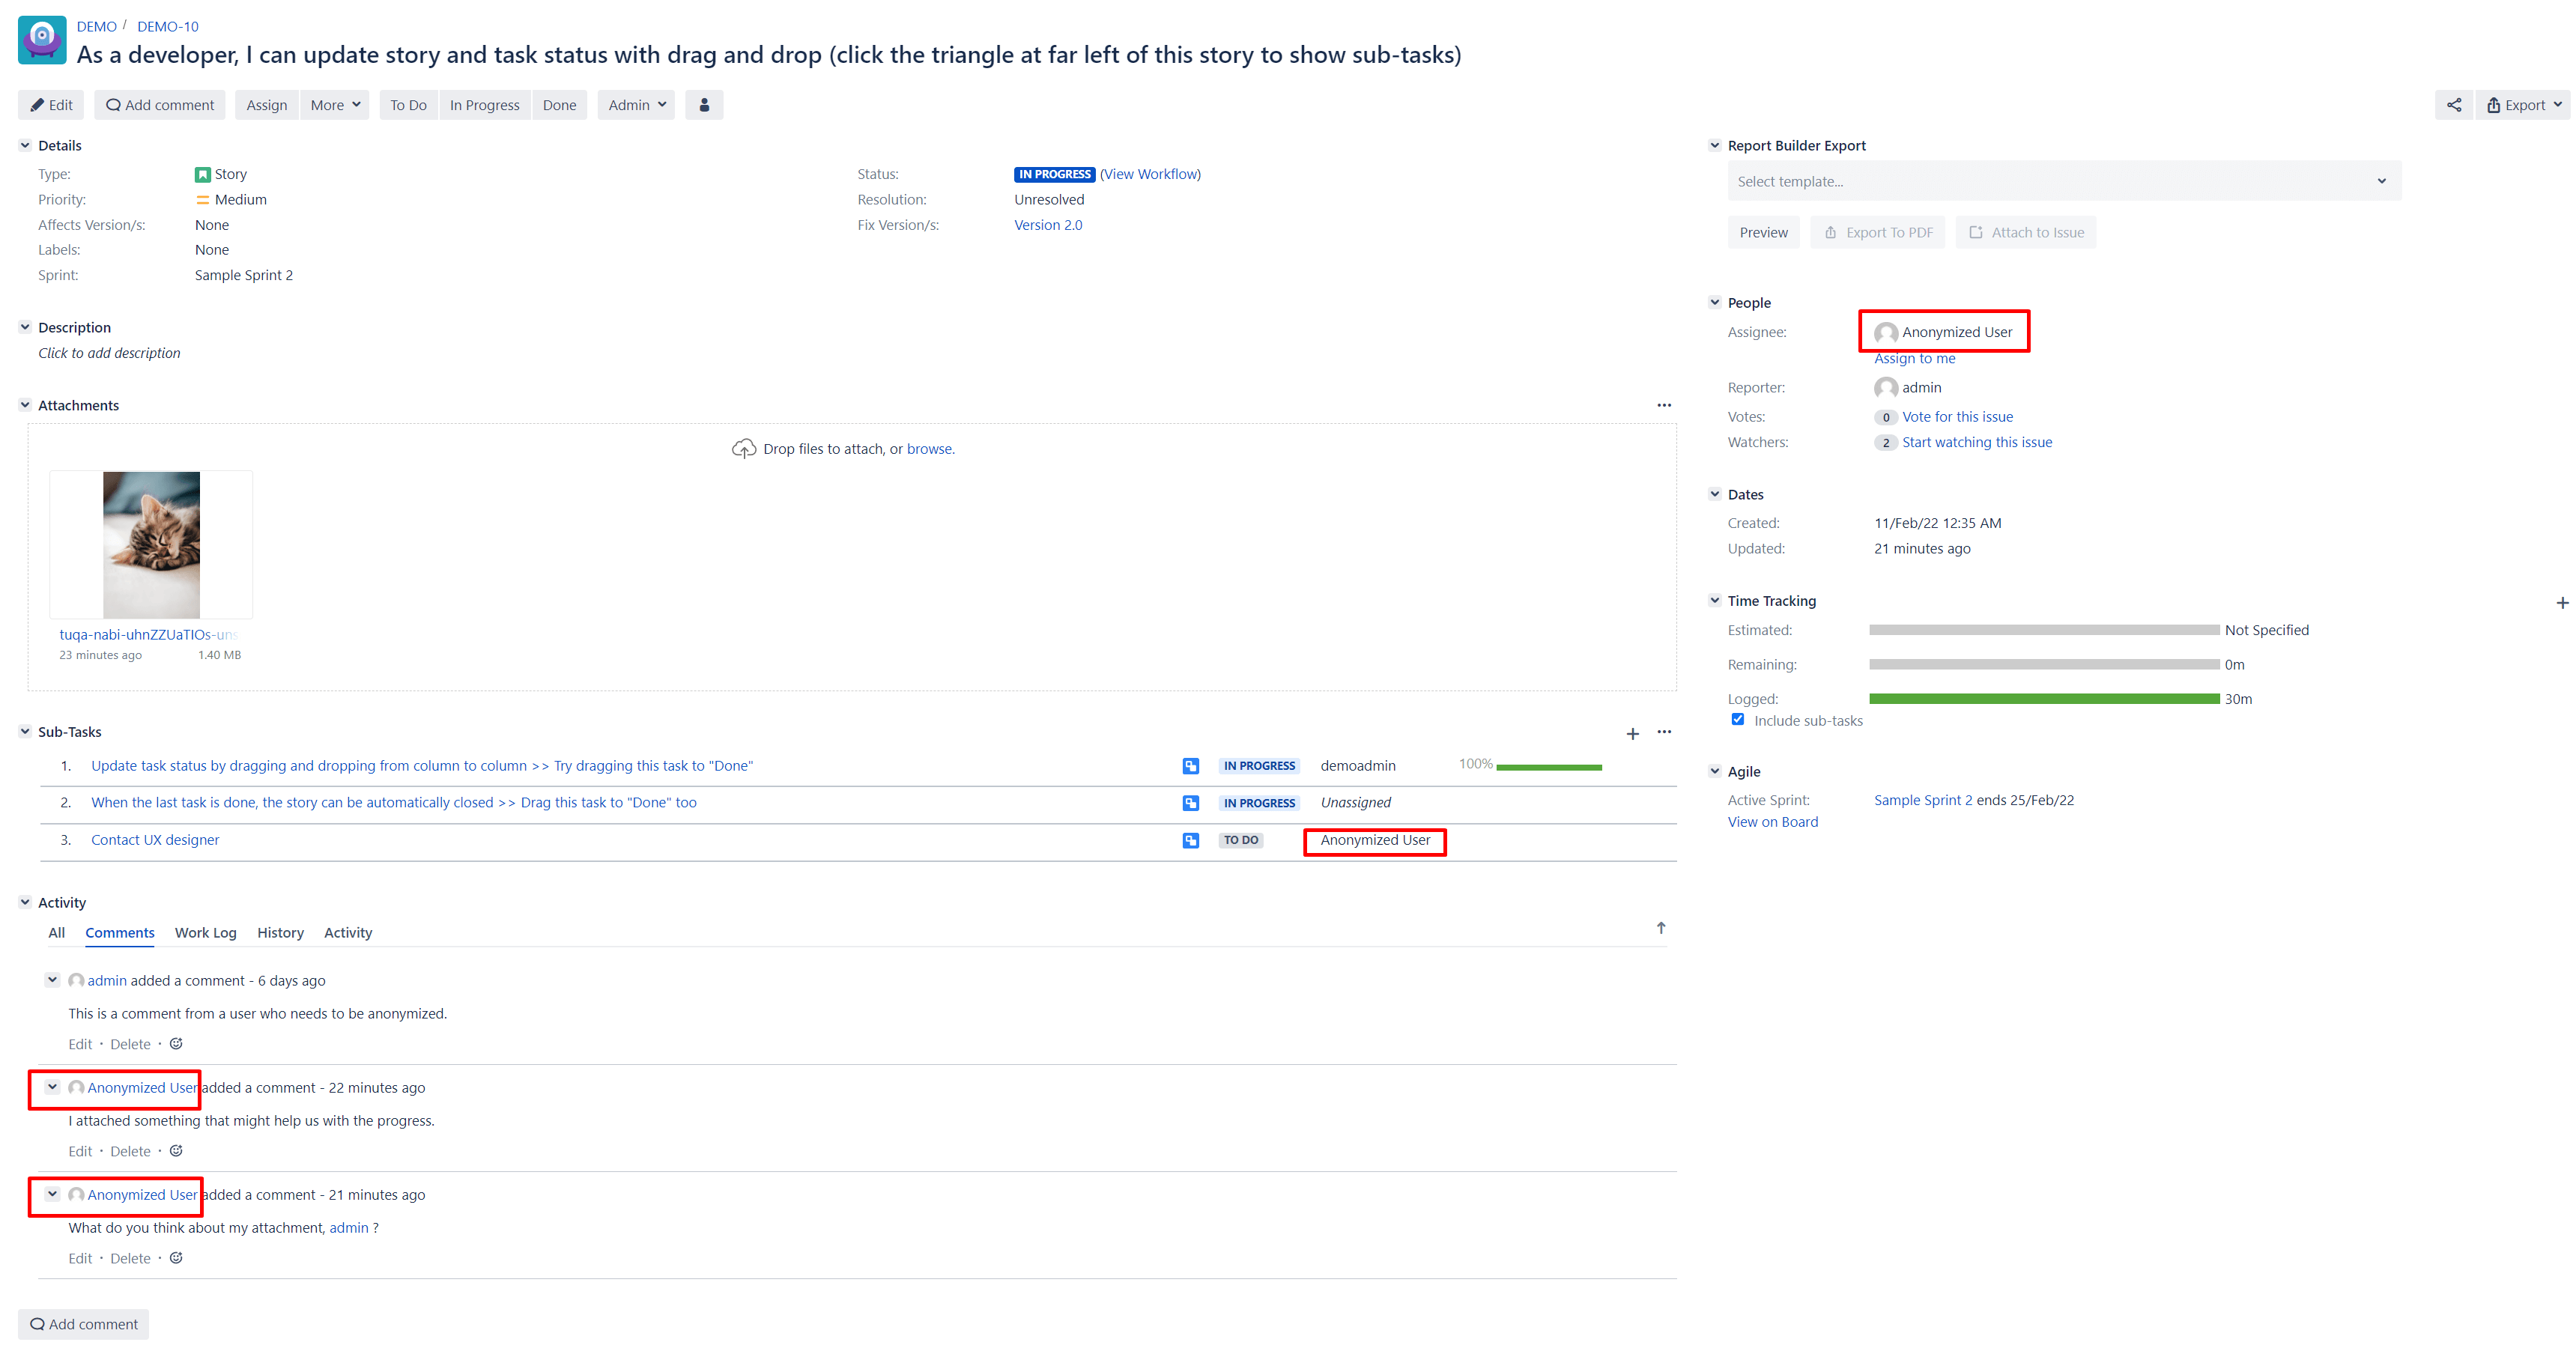
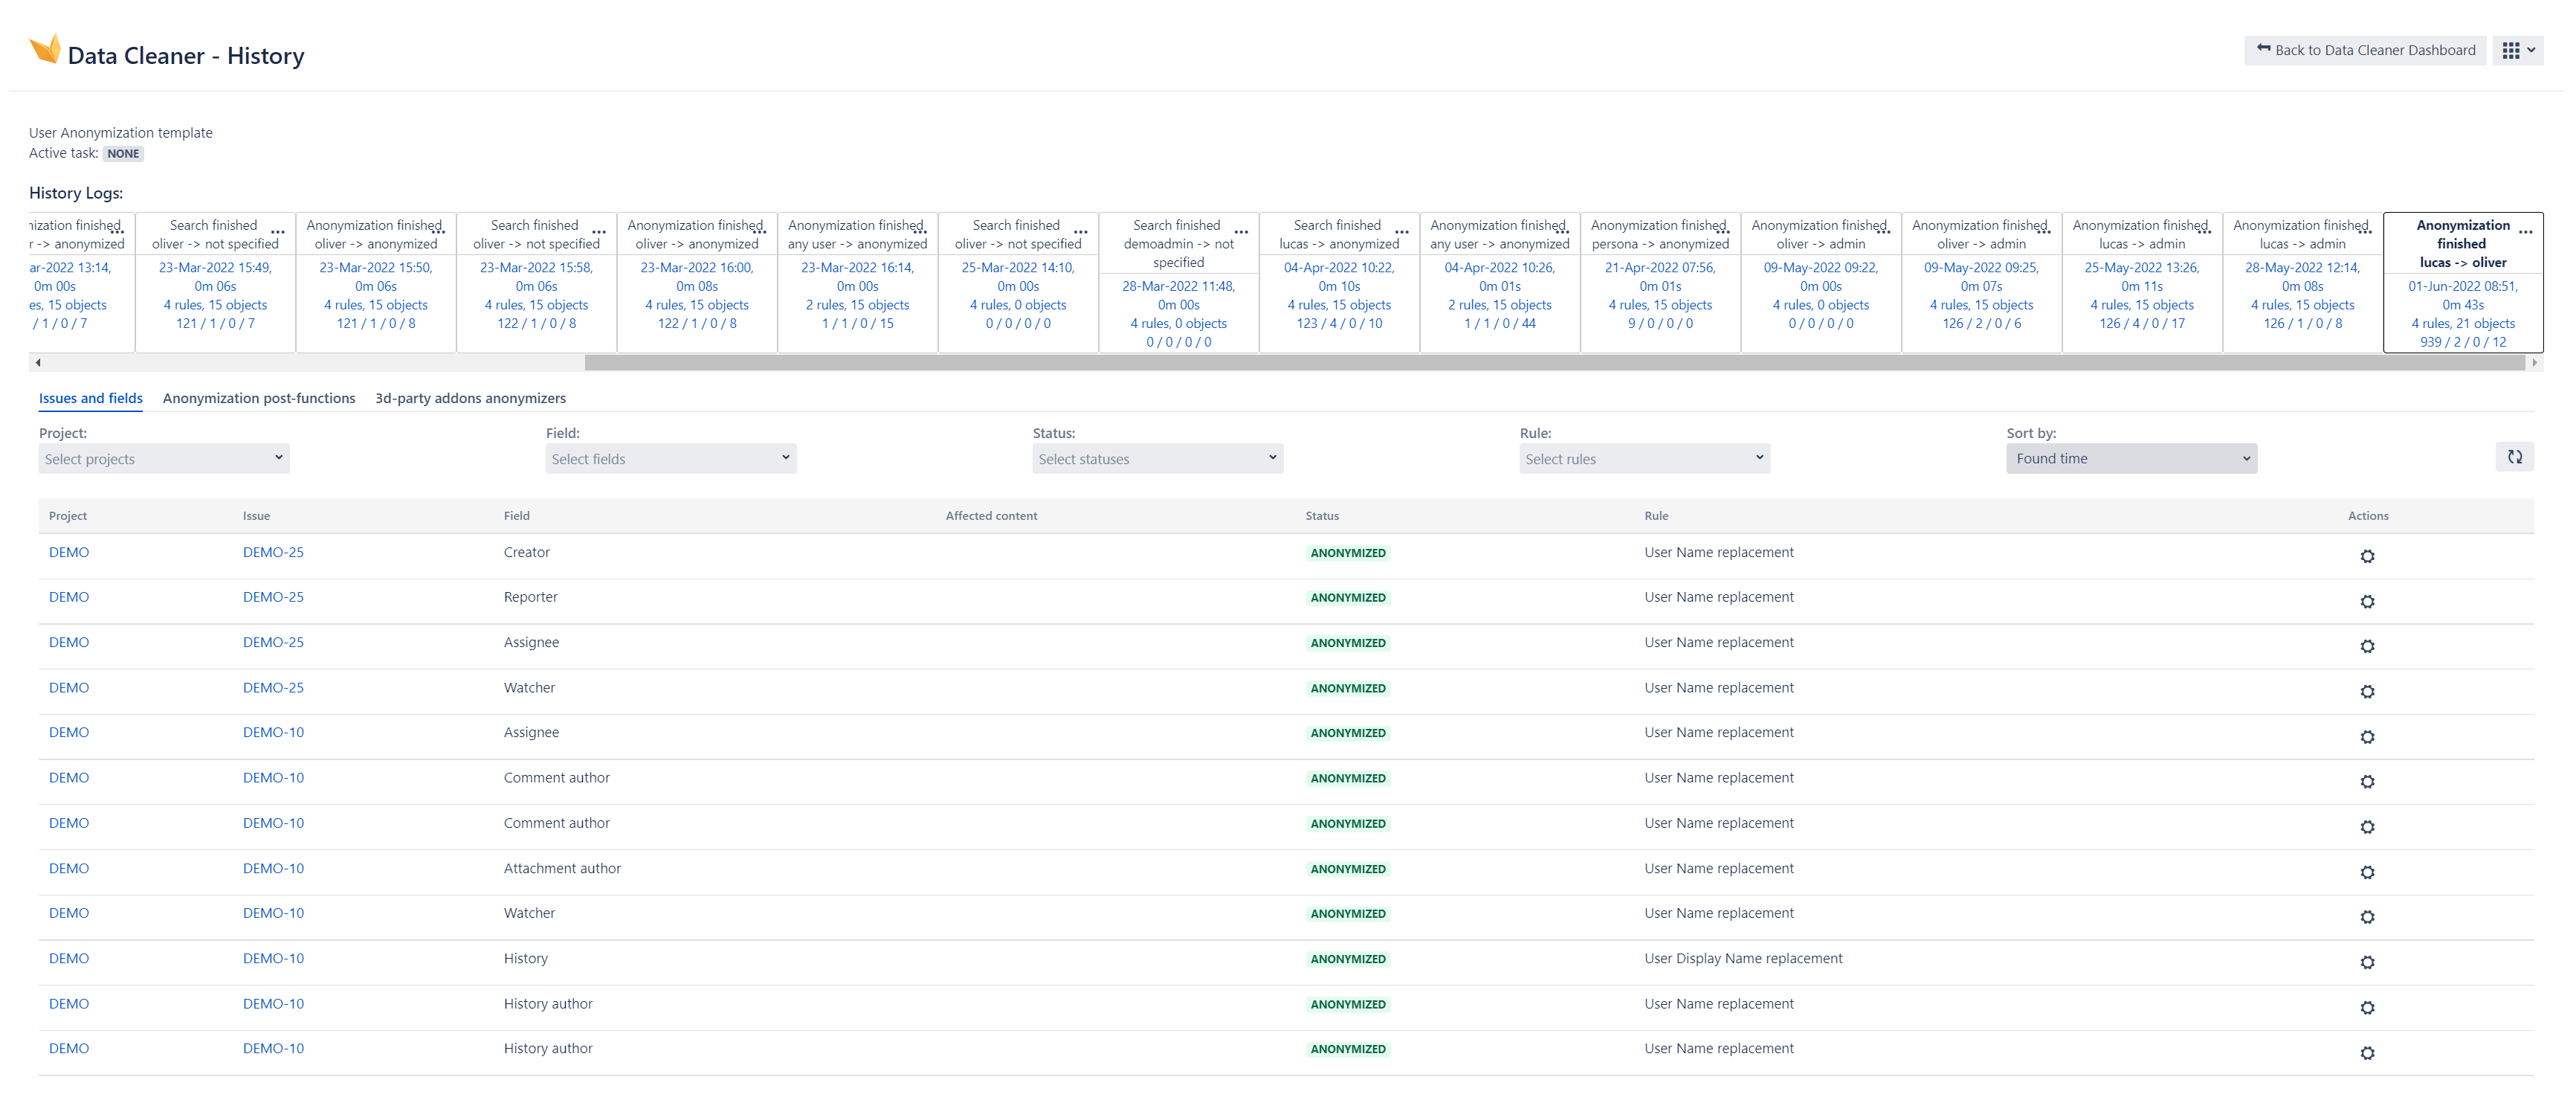
Step 8: When the process is finished, you can navigate to the overview page. It shows you what exactly has been anonymized in your project.
Congratulations, with a few clicks, you have anonymized a Jira user!
If you want to know more, please request a demo, and we will answer all of your questions!
And if you can’t wait to try this great data security tool for Jira yourself right now, feel free to do so.
