We have merged our Atlassian licensing and consulting business with our partners over at Seibert Group. The Actonic apps will continue to be developed by the same caring team as before.

Custom Reports in Jira


Basic and advanced time tracking

Jira by Atlassian simplifies the project management of your team immensely. In Jira, your working life gets organized by tickets, which helps you to work on your tasks effectively. In the creation process of your tickets, you always give information about the expected time you need for working on them.

Because of many reasons, it can be important to track the needed time for a project, teammate or client and to analyze this time through a report. For example, for team leads it could be very interesting to get an overview about the performance of their team and to lead them on their way to strategic goals based on the won information. In the collaboration with clients, time tracking can be very useful too. Through the used time per client, the project can be invoiced.

Jira offers you some useful functions to track the needed time for your tickets. Through those you can create some easy time tracking reports in Jira. But, these reports are pretty limited and unusable for the invoicing of client projects.

In this article, we will show you how to use the functions of time tracking in Jira. Afterwords, we will teach you how to expand those functions in an easy and simple way and how you can create every report you might ever need.


The default reports in Jira

Jira offers many ways to track time for processed tickets. These functions are simple to use, but their possibilities are pretty limited. In the next section, you’ll get to know how to use time tracking and how to create reports:

Therefore, it is important to check, if you have all needed admin rights. Moreover, you have to set up your templates for time tracking in a correct way and activate the right authorization types in the menu.

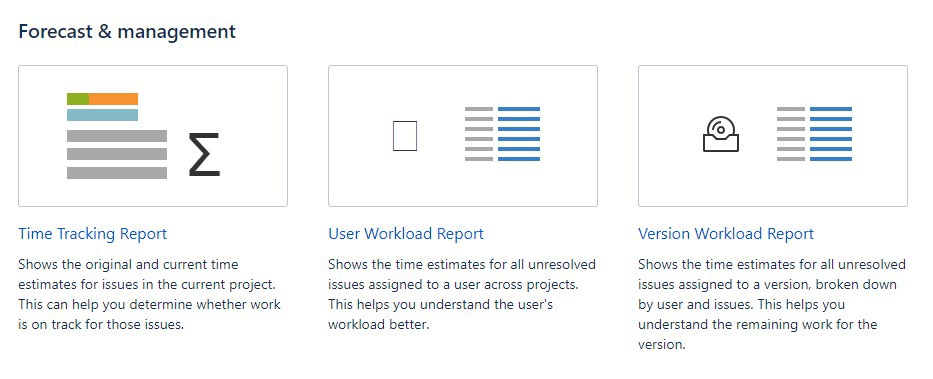
If you have the correct settings, you can create time reports in Jira. You can create basic reports if you go to the ’Reports’ section, click Forecast & management and select ’Time Tracking Report’. Then select your preferred settings and click ‘continue’ and you’ll receive your time report.

Basic time tracking in Jira: The disadvantages

If you work longer with Jira time tracking, you will notice that this function has limits in its efficiency. The following seven pain points will show you why basic time tracking in Jira is limited:

  1. You can not estimate for which tickets the most time was spent in a specific period of time.

  2. You can not group your time tracking through an epic, label, component or any other Jira field.

  3. You can not determine time for multiple projects of one client.

  4. You can not create reports for specific users, groups or teams.

  5. You can not adjust mistakes based on your time tracking results.

  6. For client projects: You can not compare the hours that are established in the contract and the logged hours a team or user has worked. This could result in a bad controllable budget of your project.

  7. You can not determine the logged time for a specific user for invoicing.

Report Builder as an extension of basic Jira time tracking

Because of the mentioned reasons, the basic Jira time tracking is helpful but restricted in its functions. A simple and easy way to close this gap is the Jira app Report Builder. This tool allows you to create every Jira report you might ever need, cause it provides two variants of reports for you: report templates and Open Source reports.

A report template is a great tool to create reports fast and easily through its predetermined settings. You can create reports like timelines and cake diagrams there. Furthermore, with the Scripted Reports function of Report Builder, you can create different Open Source reports. Here you can configure reports with HTML and JavaScript. Every created report can be exported as CSV or PDF and provided for your supervisor or client. Report Builder is the smart solution for all of the mentioned disadvantages of basic Jira time tracking and a real „all-rounder” in Jira time tracking.

An example: The Scripted report „Created vs. Resolved“

The Scripted Report „Created vs. Resolved“ is very useful for heads of big teams. This report allows you to compare the number of created and resolved tickets for a specific time frame. This empowers the team lead to analyze the workload of a team, user or project and to make decisions based on the won data.

Through choosing a specific time frame and a user, team or project as JQL scope a cake or line diagram gets created. These diagrams display the relationship of the created and resolved tickets in a graphical way. This created graphic can be the base of workload analyzes afterwards.

All used parameters can be configured and adjusted individually with HTML and JavaScript.

Curious? Let us introduce you to Scripted Reports through our article series Custom Jira Scripts with Report Builder:

Conclusion

The default time tracking function of Jira is for team leads, users and for the work with clients a very useful tool to overlook, calculate and manage the workload in Jira.

The basic function can make sense, if you’re just getting started with time management and want to get an overview about the possibilities of time tracking. But because of its restricted functions, the basic version is too limited, if you want more detailed reports that are useful for your everyday work life.

If you want to create comprehensive, detailed and meaningful reports that can be configured with HTML or JavaScript, Report Builder is the right choice for you. Report Builder is the toolkit for every report you might ever need!

Next level Jira Reporting with Report Builder

  • Create your own Jira custom reports
  • Use customizable templates
  • Export reports to CSV, Excel or PDF
Go to Atlassian Marketplace

How useful was this post?

Click on a star to rate it!

Average rating 5 / 5. Vote count: 1

No votes so far! Be the first to rate this post.